User Security
Use the User Security utility to add and manage system security settings for user records.
Xenial Back Office is equipped with a built-in security system designed to provide appropriate access to the company's data. This is accomplished through the use of user security information, such as:
Usernames and passwords.
Membership to specific user groups.
Access permission to specific sites.
Access permission to specific store groups.
Security users receive system alerts separately from a distribution list. The respective security privileges determine which menu options the user can access.
User Security Overview
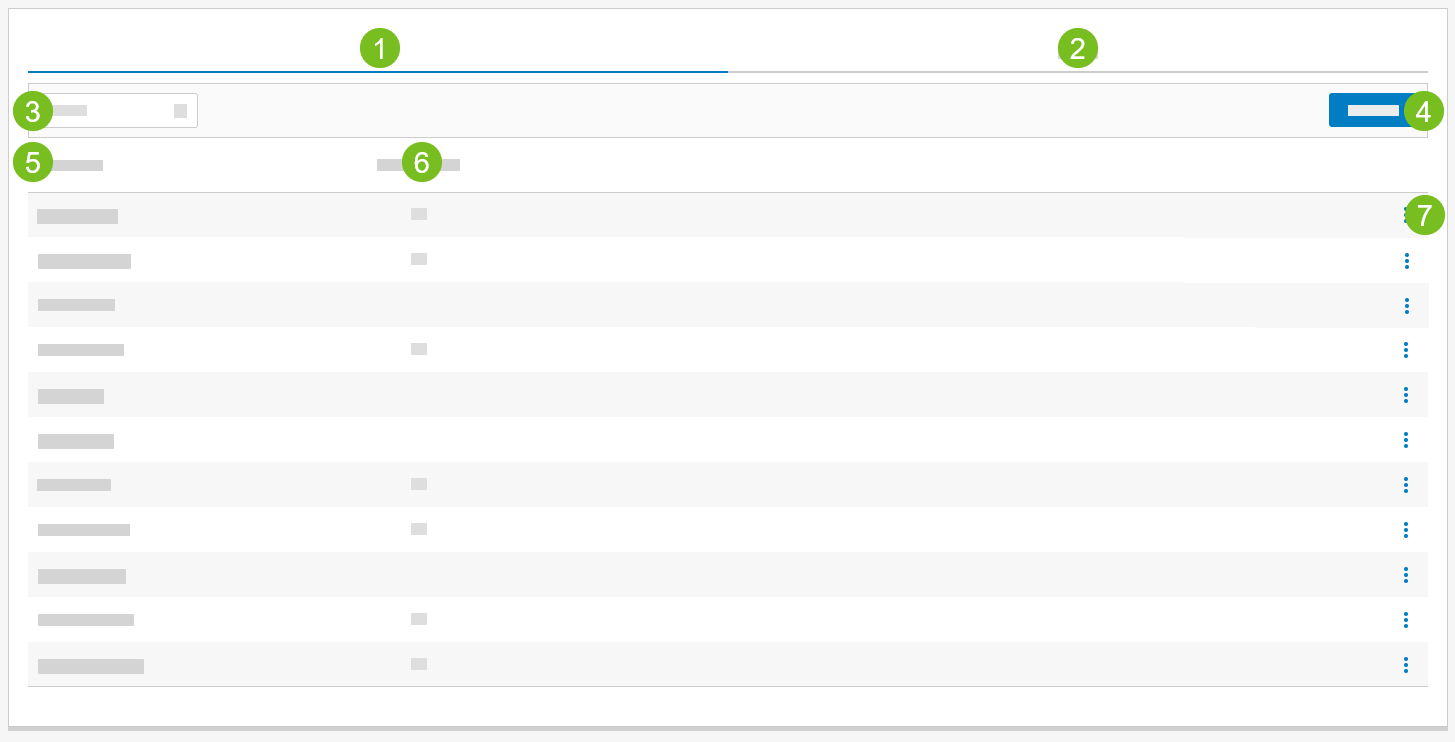 |
1 | Users | Select the Users tab to view and manage the list of security users. |
2 | Groups | Select the Groups tab to view the list of security groups. This tab is only available when the User Manager Only permission is not enabled. |
3 | Search | Type criteria to search for a user record. |
4 | Add a new user record. | |
5 | User Name | Username the employee uses to access a security point. |
6 | Administrator | A check mark in this column indicates if the user is a system administrator. |
7 | 3-Dot Menu | From the dropdown, select an action to perform on the user record:
|
Things to Know
- When adding a new user, why are the Store Alerts and Reporting Store Groups pages blank?
- Is it possible to associate a user with more than one store?
- Is it possible to assign a user to more than one security group?
When adding a new user, why are the Store Alerts and Reporting Store Groups pages blank? | |
The list of stores on the Store Alerts page is restricted to the stores selected from the Stores page. The list of store groups on the Reporting Store Groups page is restricted to the store groups selected from the Store Groups page. The store and store group lists on the Store Alerts and Reporting Store Groups pages are not updated until the current record is saved. | |
Is it possible to associate a user with more than one store? | |
Yes. From the Stores page of the user record, identify the stores the user can access. | |
Is it possible to assign a user to more than one security group? | |
Yes. From the Membership page of the user record, assign the user to the applicable security groups. When a user is assigned to a security group, the user has access to all tasks and security points that are allowed for the group. |
User Security - Instructions
Step by step instructions for managing user security are provided here:
Search User Security
→ →
From the Security screen, select the Users tab (if necessary).
From the upper-left of the Users tab, type the user name in the Search field.
The user list is automatically filtered to only list user names that match the criteria.
Add User Security
→ →
To add a user record:
From the upper-right of the Security screen, select Add User.
Define the settings on the following pages:
Page
Description
General information including name, password, and related menu.
One or more email addresses for the user.
Security groups to which the user is assigned.
Company stores to which the user is assigned.
Store groups to which the user is assigned.
Alerts are communicated for the selected stores.
Reports are communicated for the selected store groups.
Depending on how the system administrator configured the application, the Reporting Store Groups page may not be available.
From the upper-right of the screen, select Save.
User Information
Define the following settings to add general information about the user. Fields marked with an asterisk on the editor are required.
Field | Description |
|---|---|
Name | Employee's name. |
Username | Username the employee uses to access the application menu. |
Password | Password the employee uses to access the application menu. Password Requirements
|
Verify Password | Type the password again for verification. |
Menu | From the dropdown, select the menu the user accesses with the provided username and password. |
Report Zoom | Type the desired zoom value when viewing reports. Valid values: 1 - 999 |
Default Row Height | From the dropdown, select the desired height for table rows: Small, Medium, or Large. |
Account Disabled | This option is disabled when adding a new user. |
Command Line User | Toggle to Yes if the user is allowed to access and execute commands from a command-line. |
Administrator | Toggle to Yes if the user is recognized as a system administrator. |
MFA Information | This field identifies the method used to send the MFA verification code to the user. |
Email Addresses
To add an email address for the security user:
From the lower-left of the Email Addresses page, select + Add Item.
In the Email field, type the email address for the user.
Toggle HTML Format to the desired value:
Yes - (Defaut) Apply HTML formatting to email contents.
No - Do NOT apply HTML formatting to email contents.
From the upper-right of the screen, select Save.
To remove an email address:
From the Email Addresses page, locate the email address on the list.
To the right of the email address, select the X.
From the upper-right of the screen, select Save.
Membership
When a user is assigned to a security group, the user has access to all tasks and security points that are allowed for the group.
From the Membership page, select the applicable security groups for the user.
From the upper-left of the page, type criteria in the Search field to locate a specific record.
From the upper-right of the screen, select Save.
Stores
To identify the stores the user can access:
From the Stores page, select the applicable stores for the user.
From the upper-left of the page, type criteria in the Search field to locate a specific record.
From the upper-right of the screen, select Save.
Store Groups
To identify the store groups to which user belongs:
From the Store Groups page, select the applicable store groups for the user.
From the upper-left of the page, type criteria in the Search field to locate a specific record.
From the upper-right of the screen, select Save.
Store Alerts
To identify the stores about which the user receives alerts:
From the Store Alerts page, select the applicable stores for the user.
The list of stores is restricted to the stores selected from the Stores page.
From the upper-left of the page, type criteria in the Search field to locate a specific store.
From the upper-right of the screen, select Save.
Reporting Store Groups
To identify the store groups about which the user receives reports:
From the Reporting Store Groups page, select the applicable store groups for the user.
The list of store groups is restricted to the store groups selected from the Store Groups page.
From the upper-left of the page, type criteria in the Search field to locate a specific store group.
From the upper-right of the screen, select Save.
Change User Security
→ →
To change a user record:
Search for the user name using the techniques outlined in Search User Security.
From the Users tab, locate the user name on the list.
To the right of the user name, select the 3-dot menu.
From the 3-dot menu, select Change.
Make the necessary changes to the user record.
Note
The username cannot be changed.
From the upper-right of the screen, select Save.
Disable User Account
To disable a user account:
From the left menu pane of the user record, select User Information.
From the User Information page, locate the Account Disabled toggle.
Toggle Account Disabled to Yes.
From the upper-right of the screen, select Save.
Clear MFA for User
The following describes how to clear Multi-Factor Authentication (MFA) information for a user. The next time the user logs in, they will be prompted to register with new MFA information.
From the left menu pane of the user record, select User Information.
At the bottom of the User Information page, locate the MFA Information field.
To the right of the MFA Information field, select Clear MFA.
From the confirmation prompt, select Yes.
From the upper-right of the screen, select Save.
Delete User
→ →
To delete a user record:
From the Security screen, select the Users tab (if necessary).
From the upper-left of the Users tab, type the user name in the Search field.
The user list is automatically filtered to only list user names that match the criteria.
From the Users tab, locate the user name on the list.
To the right of the user name, select the 3-dot menu.
From the 3-dot menu, select Delete.
From the Delete User confirmation prompt, select Yes.