Enable FreedomPay Service
The FreedomPay Service integrates with POS API enabling simplified, cashless payment environments. FreedomPay assists with high-level-security mobile payments and business intelligences.
POS API and FreedomPay Data Flow
The POS API and FreedomPay data flow:
POS API makes a request, such as sale, void, and refund, to the FreedomPay SDK, the FreedomPay SDK is built into the SDK.
Follow the set-up instructions to enable FreedomPay for a merchant.
FreedomPay SDK exchanges data with the FreedomPay device to prompt the user and collect payment data.
When the payment data has been collected, it is pushed to the Freeway cloud for authentication. The Freeway cloud sends the authentication to FreedomPay SDK.
FreedomPay SDK responds back to the POS API describing the results of the request.
Enable the FreedomPay Service at Company Level
Note
Only a Portal user from the company with administrative permissions has the ability to enable the FreedomPay service.
To enable FreedomPay service:
Log in to the Portal.
From the upper-right of the Portal home screen, select the 4-dot menu and select Admin.

From the Admin navigation menu on the left, select All Services.
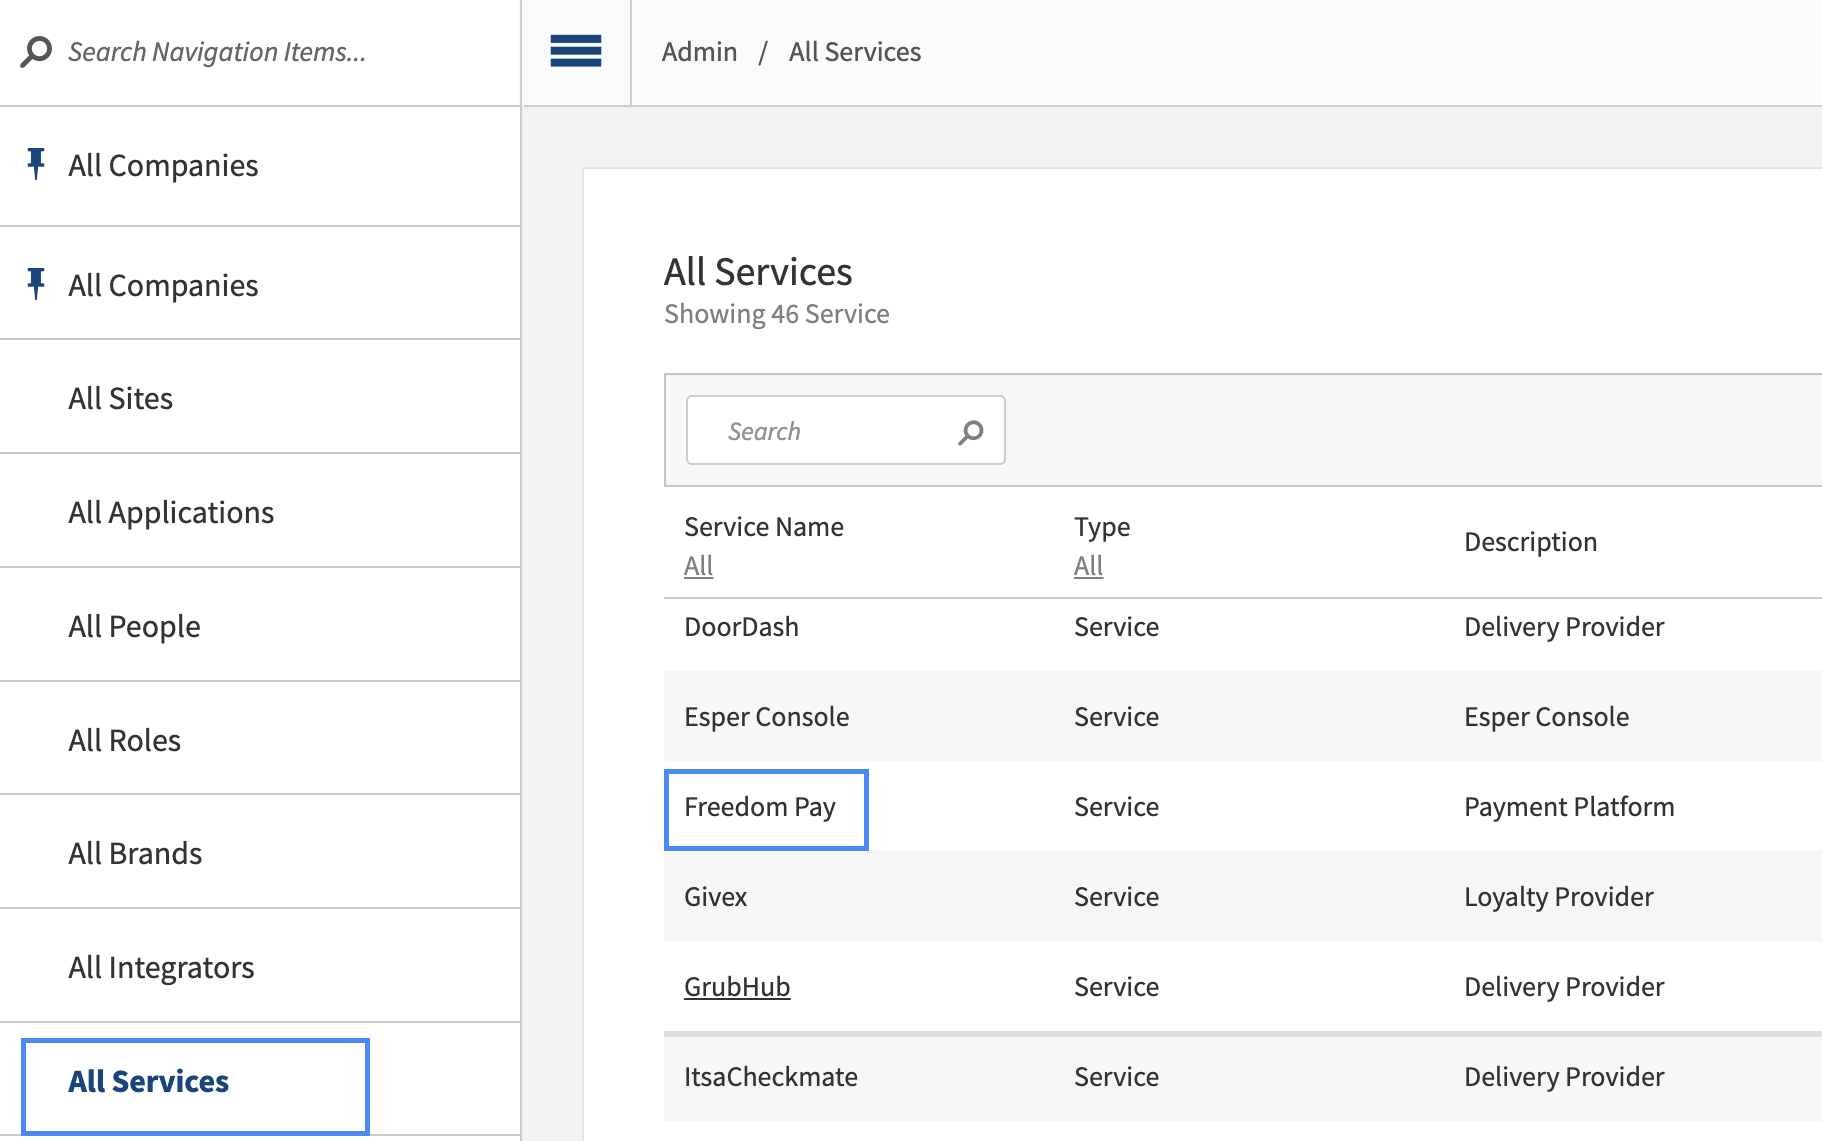
From the All Services menu, select FreedomPay.
If necessary, use the search box.
From the FreedomPay configuration area, select Add Company.
From the Add Company list, select the checkbox to the left of the company.
From the lower-right of the Add Company list, select Add Company.
From the upper-right of the FreedomPay configuration area, select Save.
To return to the Portal home screen, use the dropdown to select Change Company.
Enable the FreedomPay Service at Site Level
Note
Only a Portal user from the company with administrative permissions has the ability to enable the FreedomPay service.
To enable FreedomPay service at the Site Level:
From the Portal home screen, select a Company with FreedomPay enabled.
To navigate to the home screen, from the upper-right of the Portal, use the 4-dot menu to select Change Company.
From the Company navigation menu on the left, select Sites.
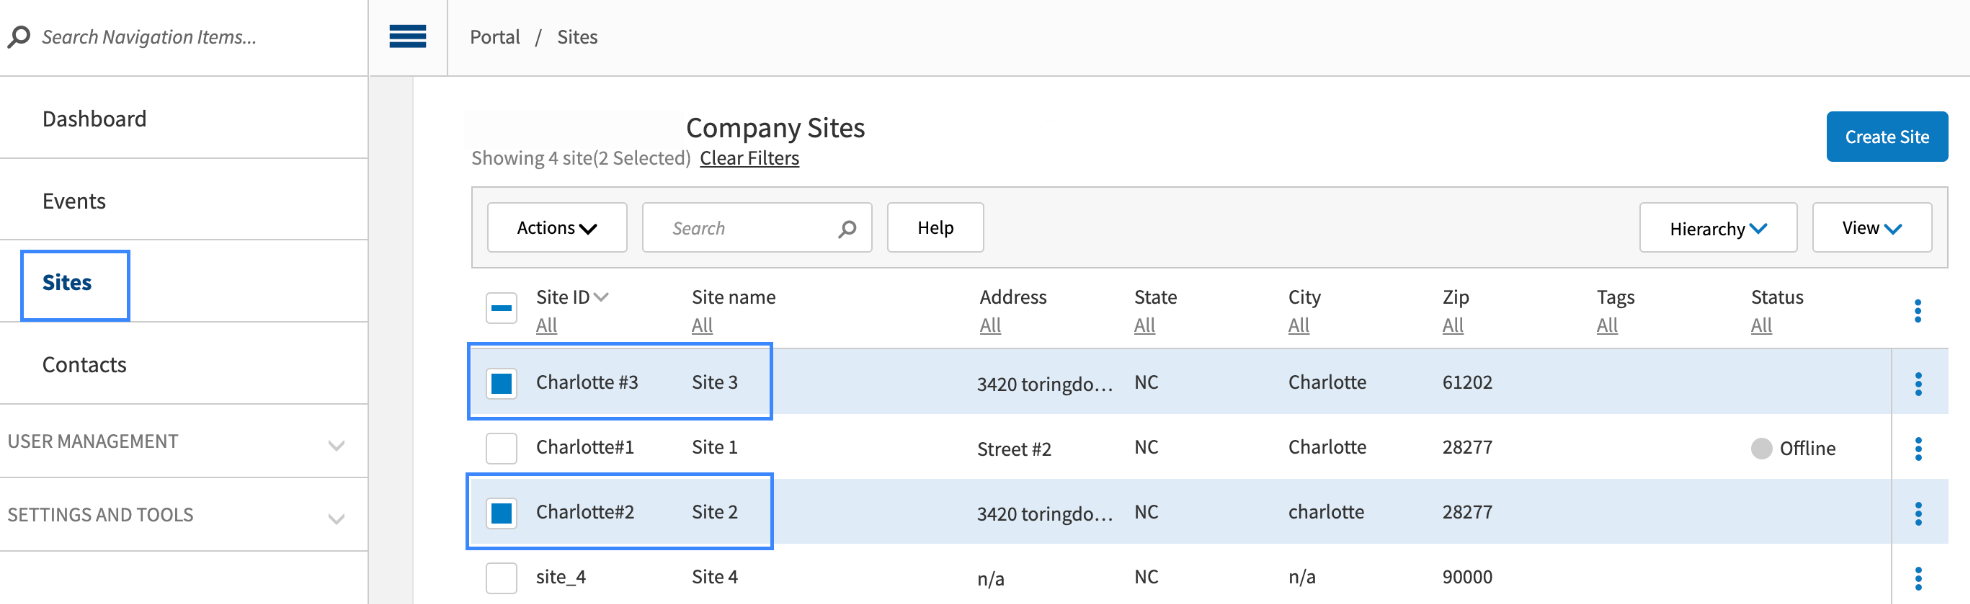
From the Company Sites list, select the checkbox to the left of the site(s).
Above the Company Sites list, select the Actions menu.
From the Actions menu, select Edit.
From the Edit navigation menu on the left, select Services.
From the upper-right of the Services area, select Add Service.
From the Add Services list, select FreedomPay.
From the lower-right of the Add Services list, select Add Service.
From the Services Area, locate the FreedomPay service.
To the right of the FreedomPay service, select the 3-dot vertical ellipsis.
From the FreedomPay service context menu, select Edit.
Continue to FreedomPay Required Information
From the upper-right of the Services area, select Save.
FreedomPay Required Information
Configure FreedomPay only after enabling the service at the site level.
To configure the FreedomPay service at the Site Level:
From the Services Area, locate the FreedomPay service.
To the right of the FreedomPay service, select the 3-dot vertical ellipsis.
From the FreedomPay service 3-dot context menu, select Edit.
In the FreedomPay configuration area, use the keyboard to type the information provided by FreedomPay in the respective fields:
Store ID
Enhanced Security Key
Device Management Activation Key
In the FreedomPay configuration area, set the Active toggle to Yes.
From the lower-right of the FreedomPay configuration area, select Done.
Return to Enable the FreedomPay Service at Site Level to complete the setup process.
FreedomPay Communication with Data Management
Once the service is deleted and confirmed, the portal sends the post request to data management via Cart API. Data Management then deactivates the devices tied to this service for the specific site(s).
Create a FreedomPay Peripheral Device
To create a FreedomPay Peripheral Device:
Log in to the Portal.
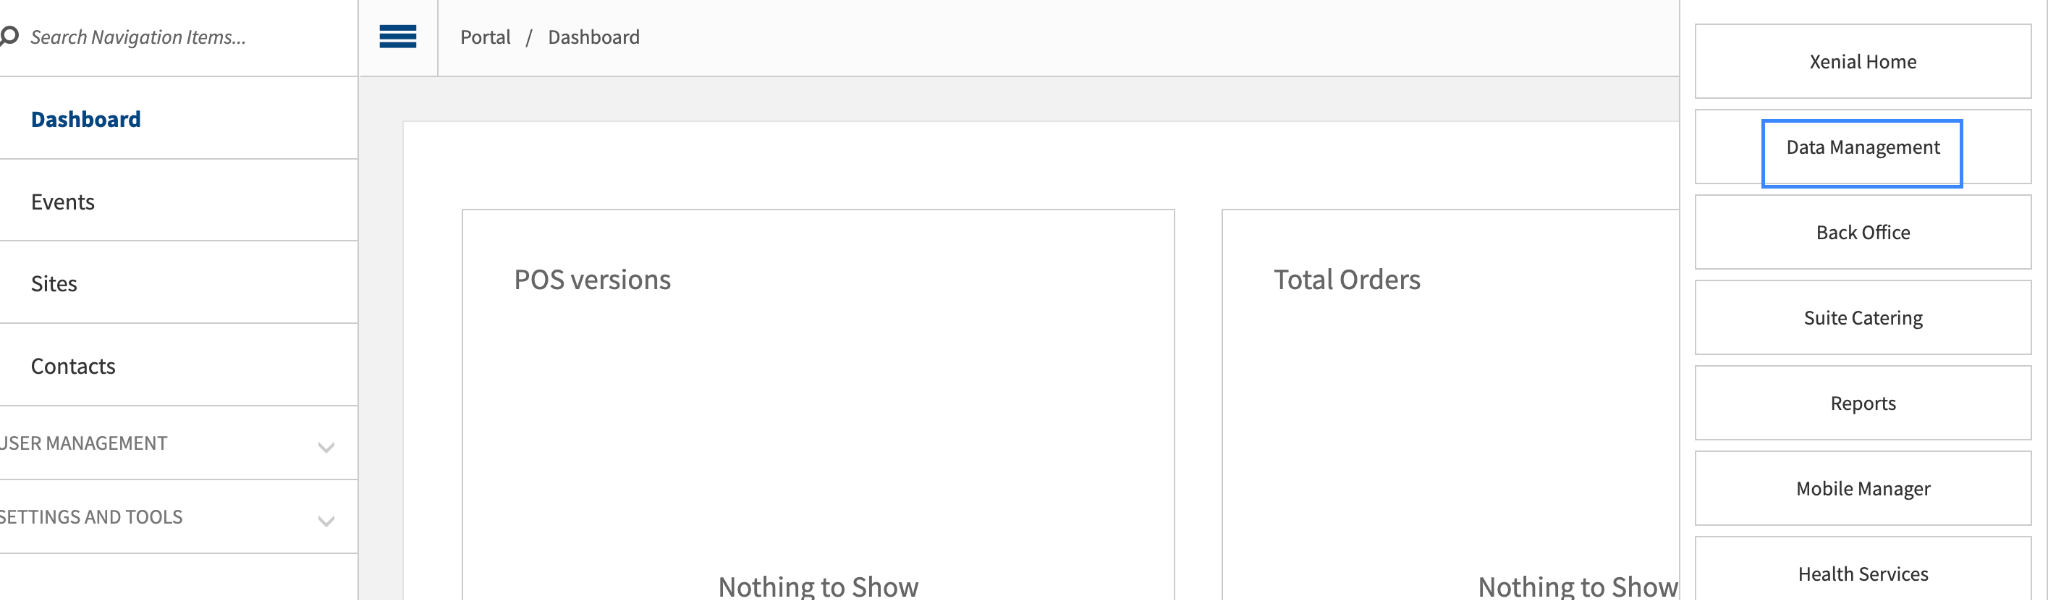
From the upper-right of the Portal home screen, select the 4-dot menu and select Data Management.
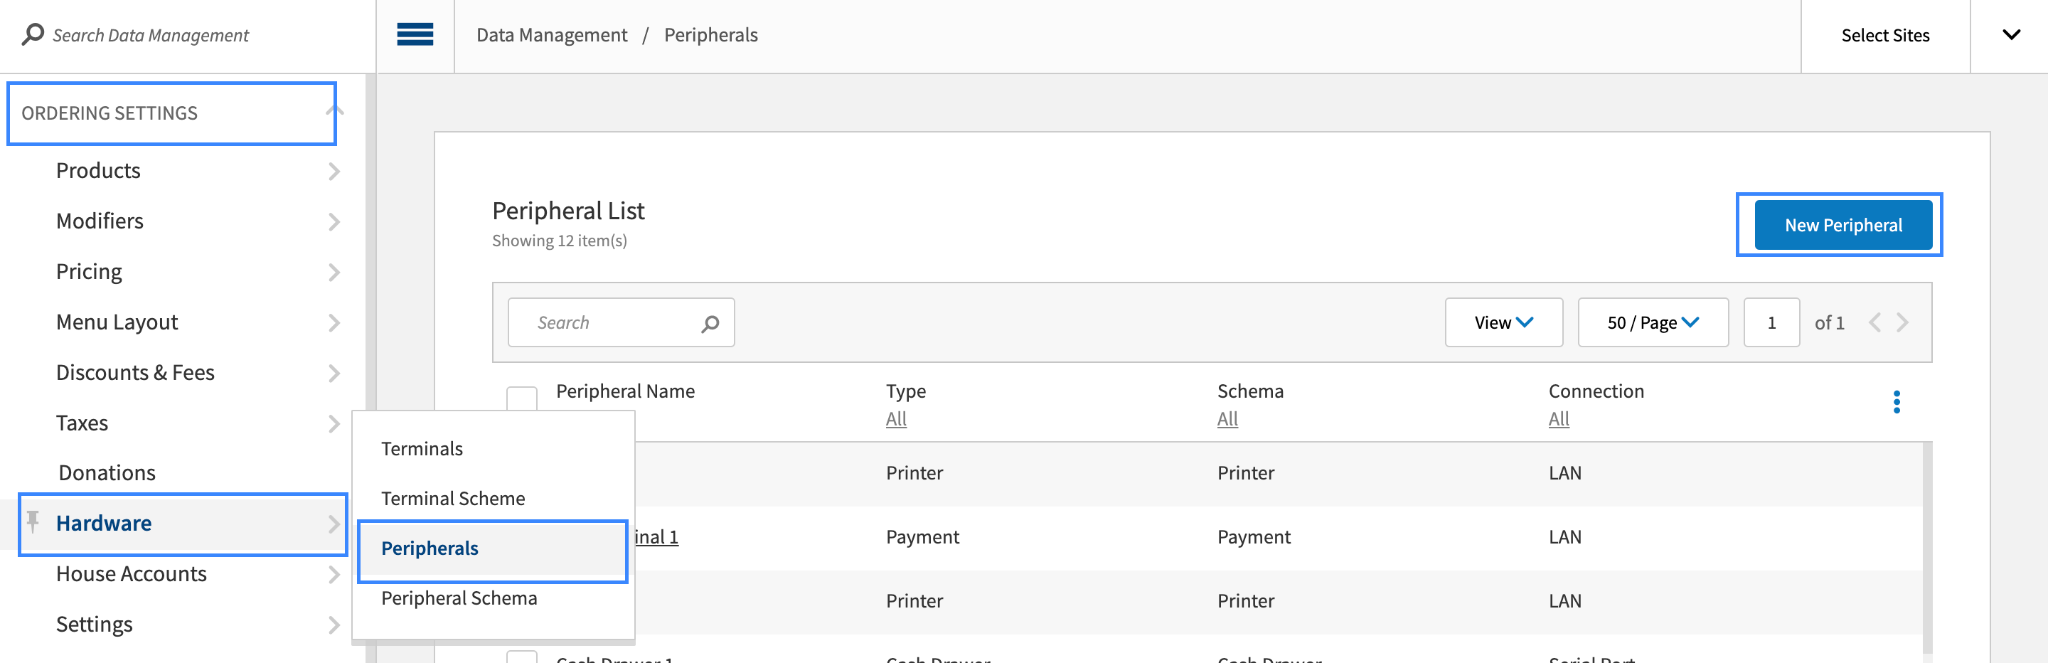
From Data Management, select Ordering Settings.
From the Ordering Settings menu, select Hardware, then Peripherals.
From the upper-right of the Peripheral List screen, select New Peripheral.
In the Create Peripheral form, select the following:
Peripheral Type: Payment
Peripheral Schema: Freedom Pay
Connection Type: FreedomPay SDK
Select Continue.
From the Create New Peripheral form, in the Peripheral Type area, slide the active toggle to Active.
From the Peripheral Configuration area:
In the Peripheral Name field, type a custom name.
In the Device ID field, type the Terminal ID (provided by FreedomPay).
Select Save.
Device ID Specifications
Each Device ID is unique therefore consider the following:
If the Device ID value is already used by another active Freedom Pay peripheral within the site, the save/activate action is restricted and the peripheral can only be saved as Inactive.
If the Device ID value is already used by a peripheral within a different site, the save/activate action is allowed for the peripheral within the site.
The device can only be saved as Active or Inactive for the particular site when all required fields are entered, and passed validation.
The device can only be saved as Active for the site if there is an active Freedom Pay subscription on the Portal.
If the device is saved as active and the subscription lapses, all payment peripherals with the FreedomPay Peripheral Schema are:
Set as inactive
Only displayed and available for editing on the Master List
Still available for selection within the list of peripherals of the Payment Terminal dropdown
Unavailable for actual mapping to the terminals for the site
Return to Create a FreedomPay Peripheral Device
FreedomPay Communication with the Portal
When the service is deleted/deactivated on the Portal, then the portal sends the post request to Data Management via Cart API to deactivate all peripherals for the particular site(s). Data Management creates a system package to perform the device(s) deactivation.
In-Store Hardware Set-up
This integration only supports the USB connection interface with the POS API Android Terminal.

Once the site configuration is complete, connect the FreedomPay Device to the USB port available on the POS API Android Terminal.
Additional Resources
FreedomPay integration helpful hints.
Summary of Supported Transactions
Transaction Type | Performed in the Certification Script | General Information |
|---|---|---|
Sale |
|
|
Refund | Basic Refund | Card Present Refund/ Card Not Present Refund |
Void | Void a previous authorization or sale | |
End-of-day Service (EOD) | Sale or Authorization with the EOD service running | FreedomPay does not offer any EOD reporting like total sales, total voids, declines, store-and-forward orders etc. |
Gift Cards |
| |
DCC | In the scope of Sale operations | Dynamic Currency Conversion |
Partial Approval | In the scope of Sale and Gift Cards operations | Partially authorizes a transaction if the customer does not have the funds to cover the entire cost on a debit card, prepaid card or gift card. The merchant can obtain the remainder of the purchase amount in another form of payment. |
Store-and-Forward (SAF) | Supports offline authorizations and maintains SAF status, including:
| |
Batch Settlement | This is part of EOD | |
Error Handling | Any error from FreedomPay is treated as a decline. Any transaction that completes is an approval. | |
Tips Capture | Captures a tip on an order payment (also includes such options as post tips and post tip adjustment). Tip is supported in pre-payment scenarios only. Post-payment tips will use the adjustment flow. | |
Signature Capture | Not supported | FreedomPay Ingenico Lane 3000 does not have signature capture capability |
Things to Know
Ingenico Lane 3000 displays lane is closed for more than 2 minutes? | |
Unplug the device and re-connect. |