Custom Loyalty Adapter | Getting Started
The Custom Loyalty Adapter Program Flow topic describes the flow between the loyalty provider and the Custom Loyalty Adapter. The Custom Fields Object topic includes information on the fields for the Custom Loyalty Service. The Quick Start topic includes steps for integrating the Custom Loyalty Adapter to the point of sale (POS) system.
Custom Loyalty Adapter Program Flow
The Custom Loyalty Adapter sends request and response messages between Gift and Loyalty and the loyalty provider using the Service URL provided in Portal. All request and response messages follow the formats described in the Operation Definitions, with additional data required by the loyalty provider included in the Custom Fields object.
During transactions enabled by integration through the Custom Loyalty Adapter, the flow of data is as follows:
The point of sale (POS) system sends a request containing a loyalty transaction to Gift and Loyalty.
Gift and Loyalty retrieves the Custom Service information from the Portal, augments the message according to the provided specifications, and sends the request to the loyalty provider using the specified Service URL.
Note
If a loyalty provider requires an authentication token to access their service, they need to provide this token to our system. Our system stores their token safely and send it with each request.
The loyalty provider returns a response message to Gift and Loyalty.
Gift and Loyalty formats the response as needed and sends a response to the POS system.
The flow diagram below shows in detail the flow of request and response messages between the POS system, Gift and Loyalty, and the loyalty provider:
 |
Custom Fields Object
The Custom Fields object contains all of the fields defined within the custom loyalty service created while setting up the Custom Loyalty Adapter or Custom Gift Adapter in Portal. The name of the object will be the name specified during setup. For the integration to succeed, the Custom Fields object must contain a field for each piece of data required by the loyalty service or gift provider that is not provided by our system as defined in the operation definitions below.
Below is an example of the body of a Redeem Rewards request that our system would POST to the URL of the custom service provided during setup. The Custom Fields object in this example uses the name "configuration."
{
  "action_type": "redeemReward",
  // The Custom Fields object containing the fields
     specified during setup in Portal
  "configuration": { /* ... */ },
  "clerk_id": "17",
  "terminal_id": "001",
  "terminal_txn_id": "9999",
  "application_version": "0.0.1",
  "integrator_name": "string",
  "integrator_type": "string",
  "local_time": "999999",
  "local_date": "20YY0430",
  "date_time": "20YY-03-30T00:00:00.002Z",
  "check_id": "string",
  "receipt_datetime": "string",
  "order": { /* ... */ }
Quick Start: Portal Setup
To set up the integration between a loyalty provider and point of sale (POS) in the Portal, create a custom service, enable the new service for the company, then add the service on the site level. Use the following steps:
Create Custom Service
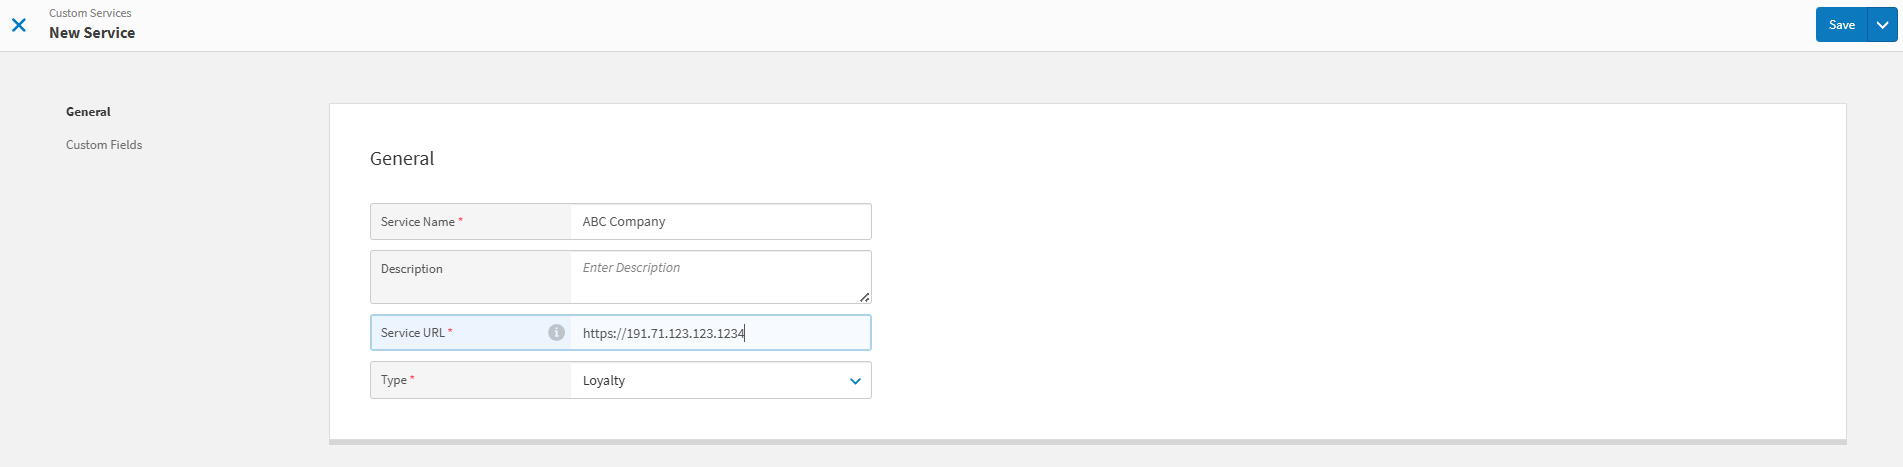
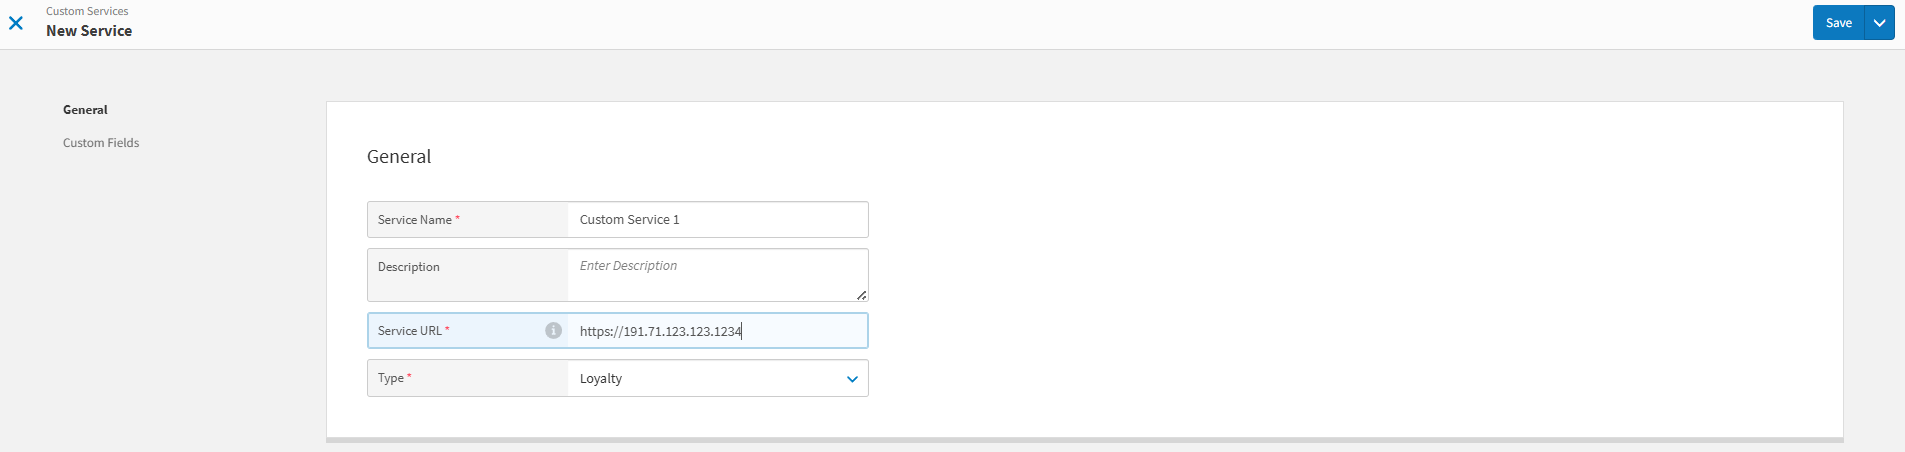
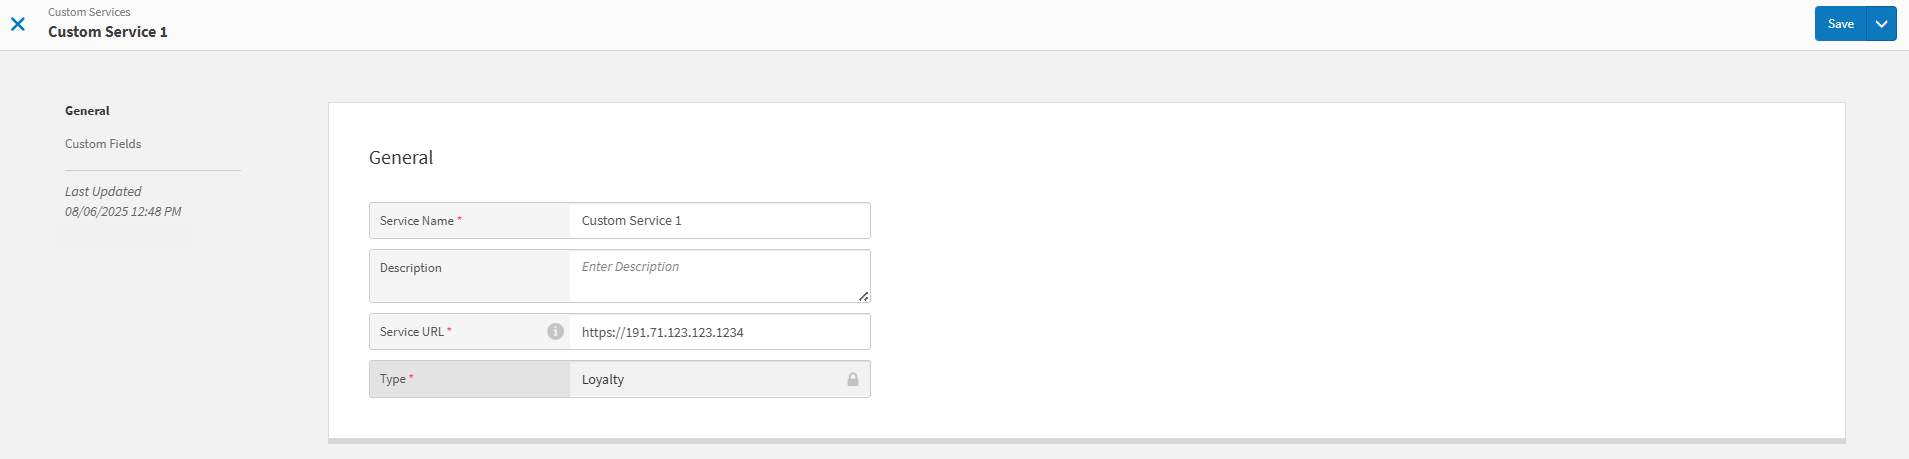
Navigate to Portal → Custom Services.

Select Add Custom Service.
Enter a Service Name, Service URL, and Description.
Add and create all Custom Fields needed, according to the configuration of the particular custom loyalty service, as described by the following steps:

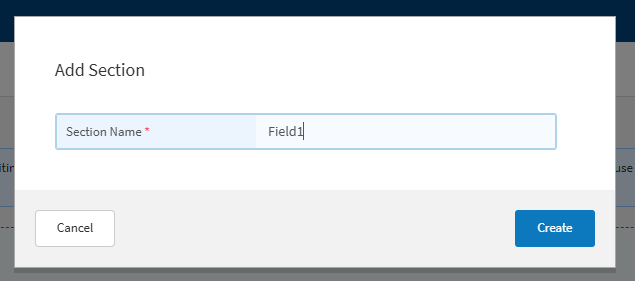
If needed, select Add New Section, enter the name of the section, and select Create. Use this option to separate Custom Fields into sections as required.
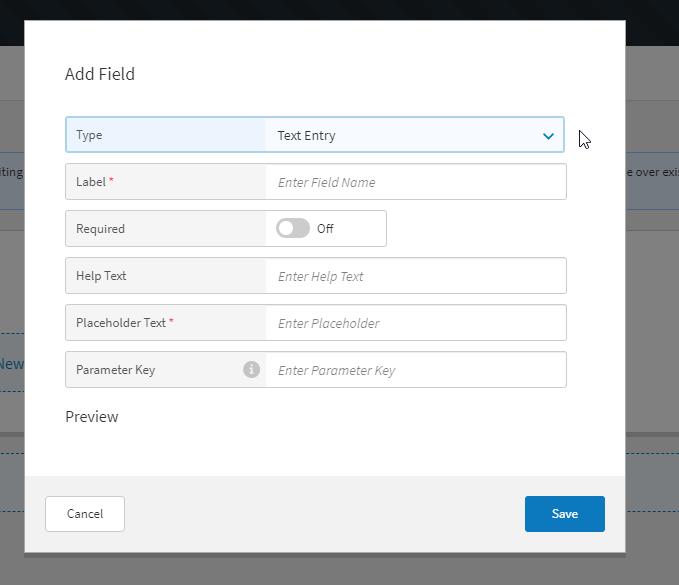
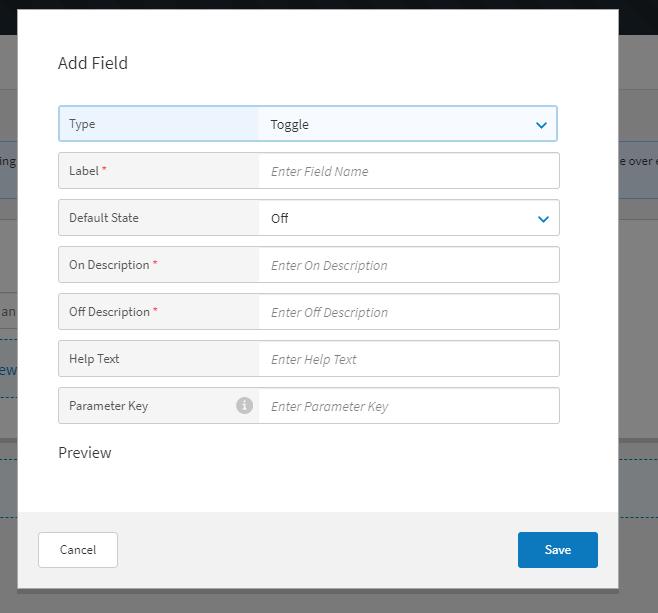
Custom Fields can be Text Entry, Toggle, or Dropdown fields. For each field, select the desired type and enter a field name, as well as a Parameter Key if required. Each type of field requires additional information:
For Text Entry fields, enter placeholder text and define whether the field is required.
For Toggle fields, enter on and off descriptions and define the toggle's default state.
For Dropdown fields, enter placeholder text, define whether the field is required, and define all field choices.
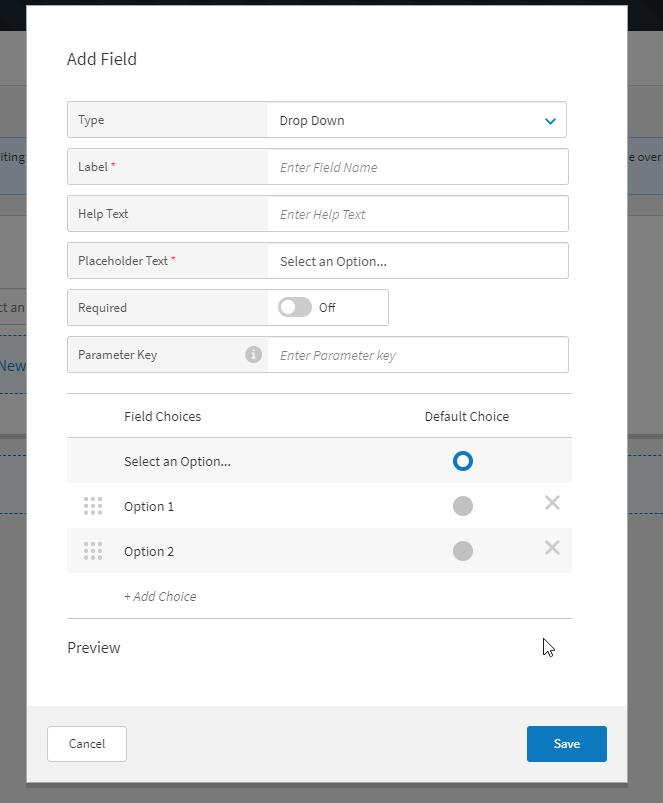
Select Save to create or update the Custom Service.
Enable Custom Service for the Company
Navigate to Company Settings.
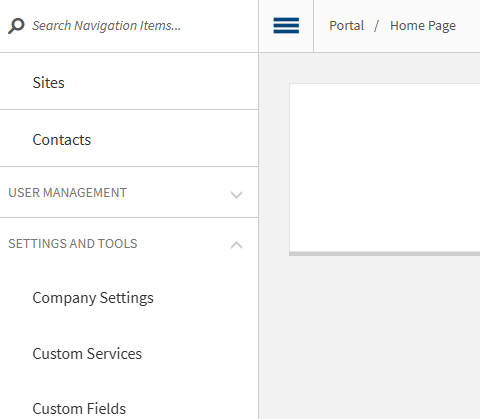
Select Services.
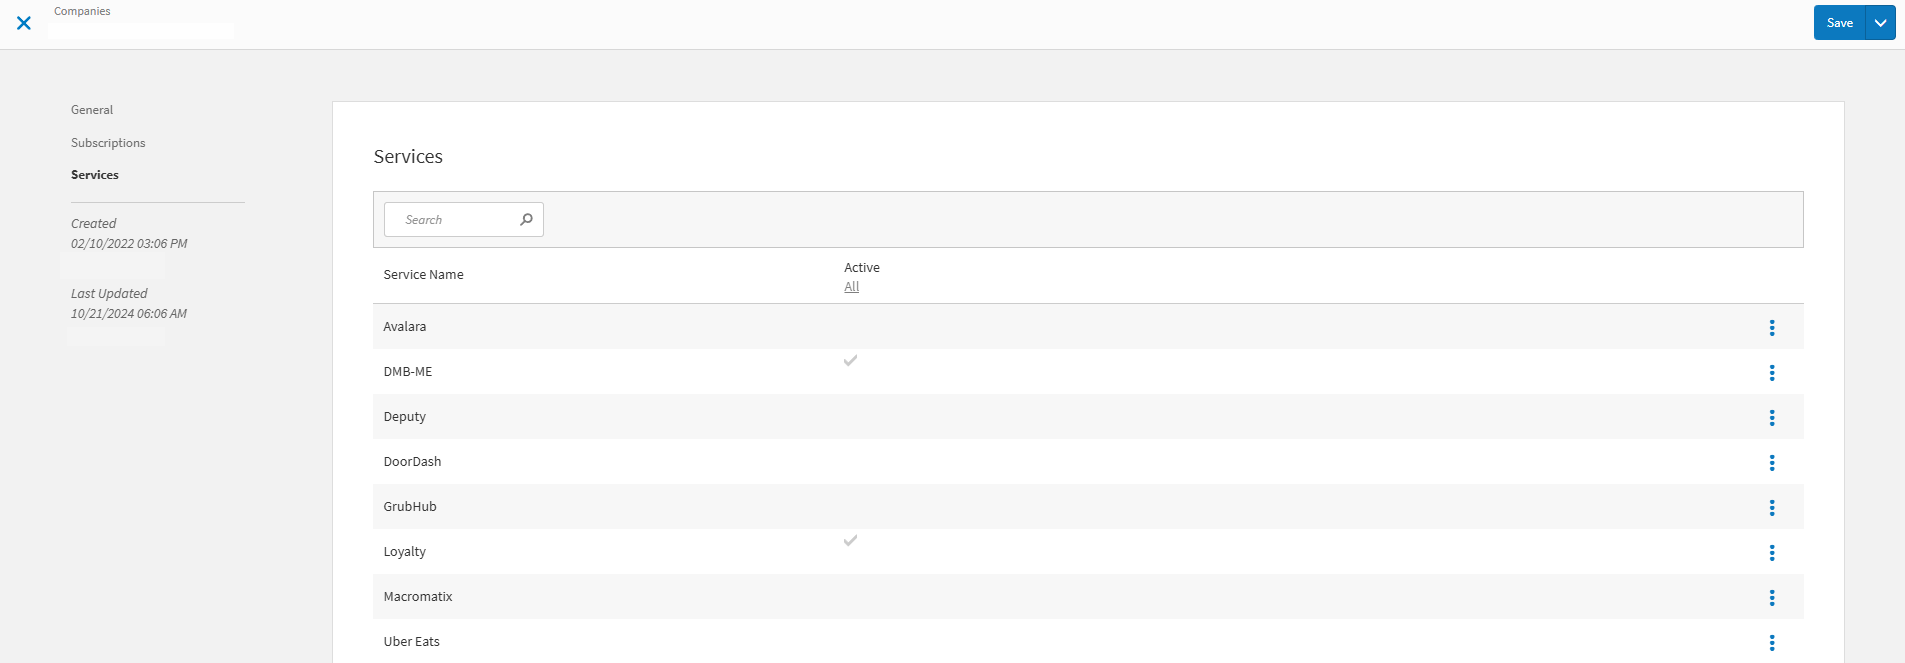
Select the 3-dot menu next to the Custom Service and choose Edit.
Enable the Custom Service, ensure that the Service URL is correct, and save the service. All other loyalty services must be disabled before the Custom Service can be activated.
Fill in all Custom Fields, as required.
Save Custom Service on the Site Level
Select Site → Services → Add Service.
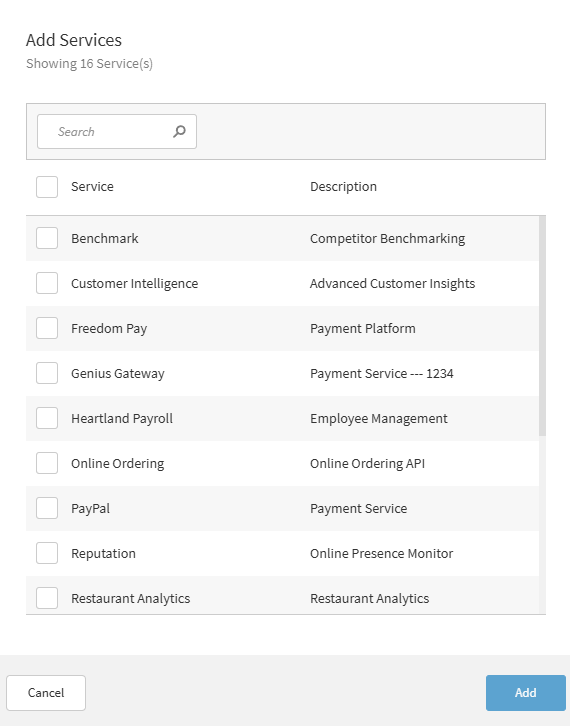
Select the Custom Service.
Select Add Service.
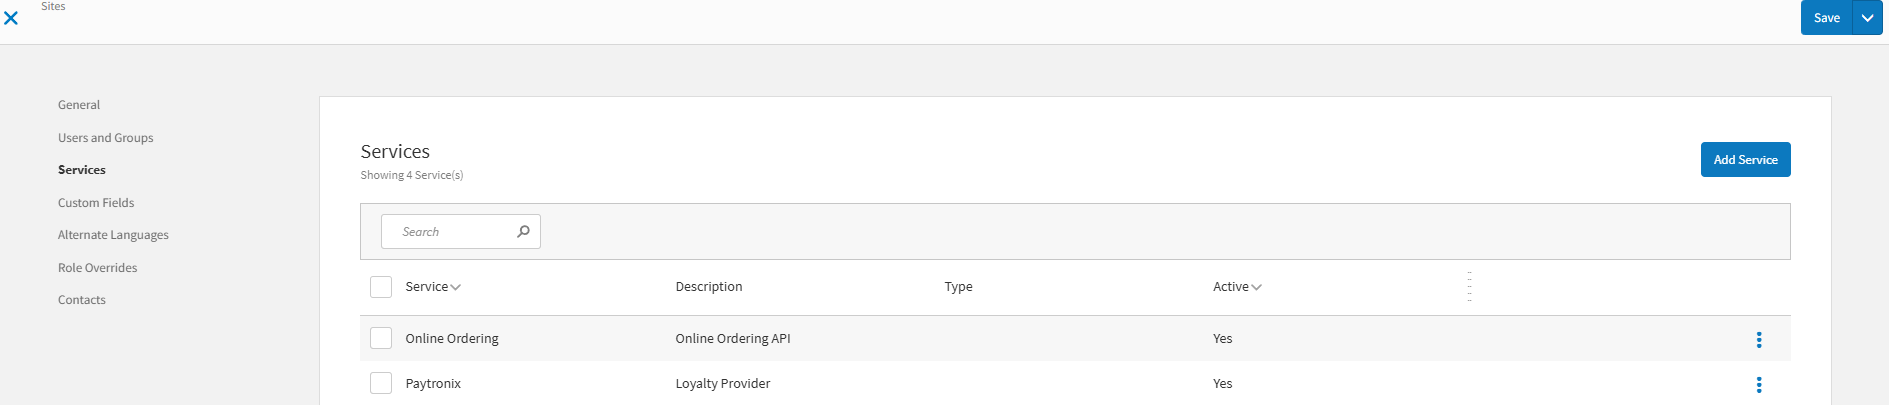
Select the 3 dots menu for the Custom Service and choose Edit.
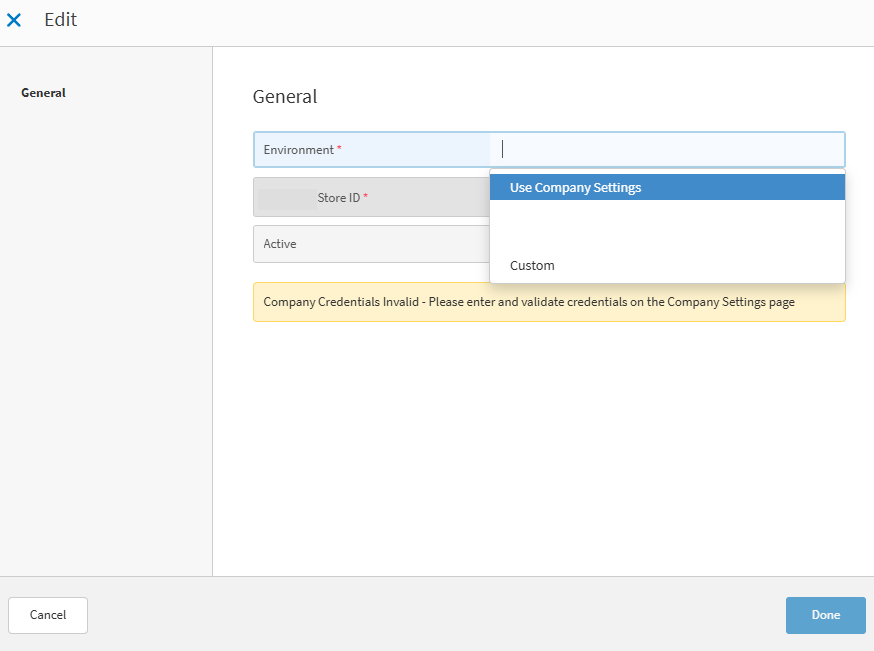
Activate the service by setting the Active toggle to Yes.
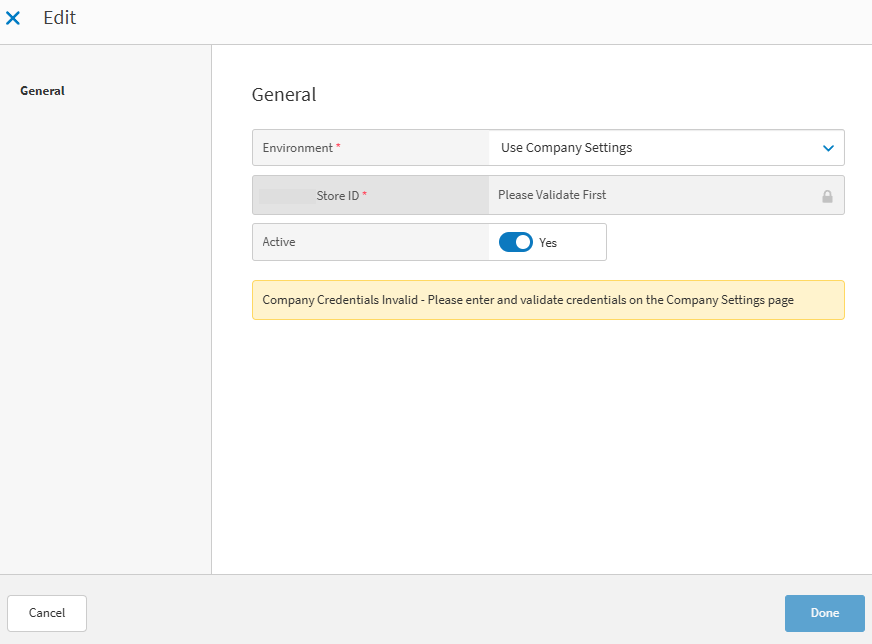
Select either Use Company Settings or Custom. If choosing Custom settings, set a different Service URL and Custom Fields as desired.
Save the service.