Configuration
The Device Bridge implementation configuration documentation includes the following topics:
Data Management and Peripheral Configuration - Steps for peripheral device creation and configuration
Terminal Configuration - Steps for each terminal's configuration
Data Management and Peripheral Configuration
The configuration documentation includes the following topics:
Peripheral Creation
To start, create each peripheral device:
From the Portal, navigate to Data Management→Ordering Settings→Hardware→Peripherals.
From Peripherals, select New Peripheral.
From Create Peripheral, select an option for each:
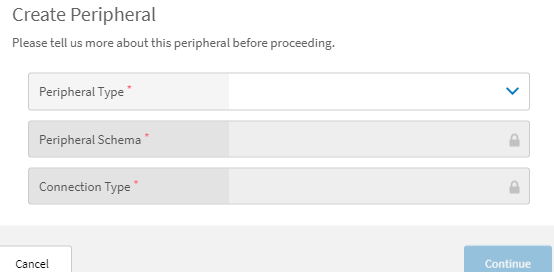
From Create Peripheral, select Continue.
The Peripheral Configuration and Connection Configuration modals are activated. Select the fields for each listed in the corresponding topics.
Create Peripheral Fields
The Create Peripheral fields names and descriptions are listed in the table below.
Field Name | Description |
|---|---|
Peripheral Type | The type of hardware such as printer or cash drawer |
Peripheral Schema | For some types, this is similar to a sub-type. Select the best match. |
Connection Type | This field should be set to OPOS |
Peripheral Configuration
The Peripheral Configuration modal is shown below. Select an option for each field.
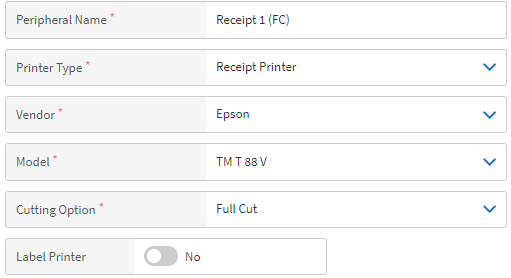 |
Peripheral Configuration Fields
The Peripheral Configuration field names and descriptions are listed in the table below.
Field Name | Description |
|---|---|
Peripheral Name | The descriptive name displayed at the point of sale (POS) device. It is also displayed when selecting this printer for specific terminals. NoteThis is not the logical device name (LDN). |
Printer Type | The possible values are:
|
Vendor | The brand of the device such as Epson or Logic Controls |
Model | This field should match the device being used |
Cutting Option | The possible values are:
|
Label Printer | Set the toggle to Yes to enable the label printer |
Connection Configuration
The Connection Configuration modal is shown below. Select an option for each field. Complete these steps for each device.
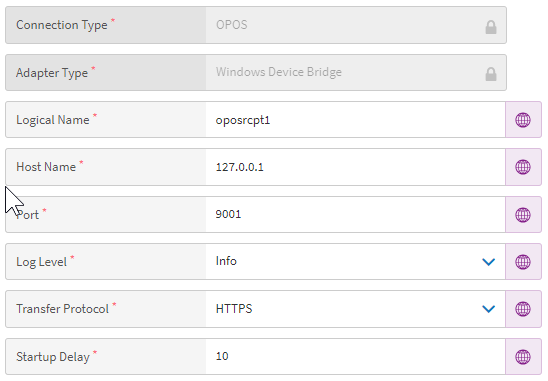 |
Connection Configuration Fields
The Connection Configuration field names and descriptions are listed in the table below.
Field Name | Description |
|---|---|
Connection Type | OPOS should be selected for this field, which is automatically entered |
Adapter Type | The Device Bridge type, which is automatically entered |
Logical Name | Use the LDN noted when the device was set up in OPOS |
Host Name | The network address where the OPOS service is installed. The Hostname or IP, often localhost (127.0.0.1). |
Port | This field is unique for each device on a single terminal. The number is greater than 1024, and printers usually start at 9001. |
Log Level | The default value is
|
Transfer Protocol | The default value is |
Startup Delay | The default value is |
Terminal Configuration
After each device is set up, specify the device to be used for each terminal:
From the Portal, navigate to Data Management→Ordering Settings→Hardware→Terminals.
From Terminals, select Peripherals in the left pane.
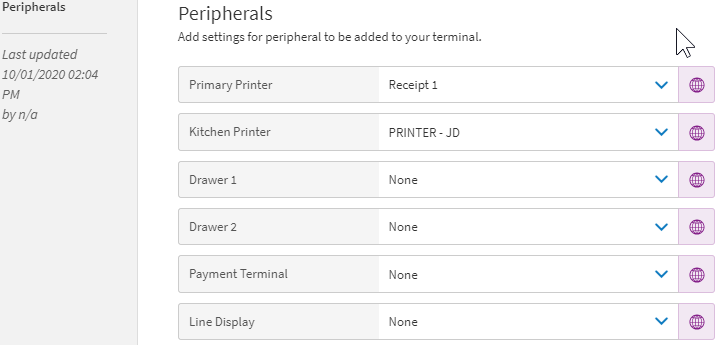
The terminal's configuration can be unique for each store or the default configuration can be used. A terminal's configuration is downloaded from Data Management when the Shell loads.