Menu Genie
Menu Genies are designed to build a menu path almost entirely from the existing menu items. After the path is set for an item, it allows the addition of modifiers, suggested modifiers, and additional items to be added to the corresponding menus.
The suggested modifiers are any and all modifiers that can be added to an item. Menu Genie is designed to reduce the number of menus and unique paths for like items when the modifier options are different.
The process of adding an item, modifier, and suggested modifier to a menu can be achieved by using attributes. Attributes, modifiers, and suggested modifiers work together to consolidate steps by attaching items to multiple menus at the same time.
Set Up Suggested Modifiers
Suggested modifiers are modifiers that are set up as a suggested upsell to the guest, based on the menu item. All modifiers should be categorized. This is done using attributes so that a single item can then fall into multiple categories.
→ → →
To set up suggested modifiers:
From Items, select the appropriate menu item, select Advanced.
From the menu item General tab, scroll down to Add Attribute, and add the following attribute:
Name Description
Value
Enter the item name in the Name text box.
TRUE
Importante
All attribute names and values are case and space sensitive, excluding numeric values. Enter all attribute names exactly as listed in this documentation.
From the menu item General tab, select Add Attribute and select OK.
After a Name and Value have been entered, the suggested modifiers are available to be selected in the dropdown menu as an attribute. For example, Bread = TRUE, Toppings = TRUE.
Screen Capture
Add Attribute |
|

Build the Suggested Modifiers List
→ → →
To build a suggested modifier list:
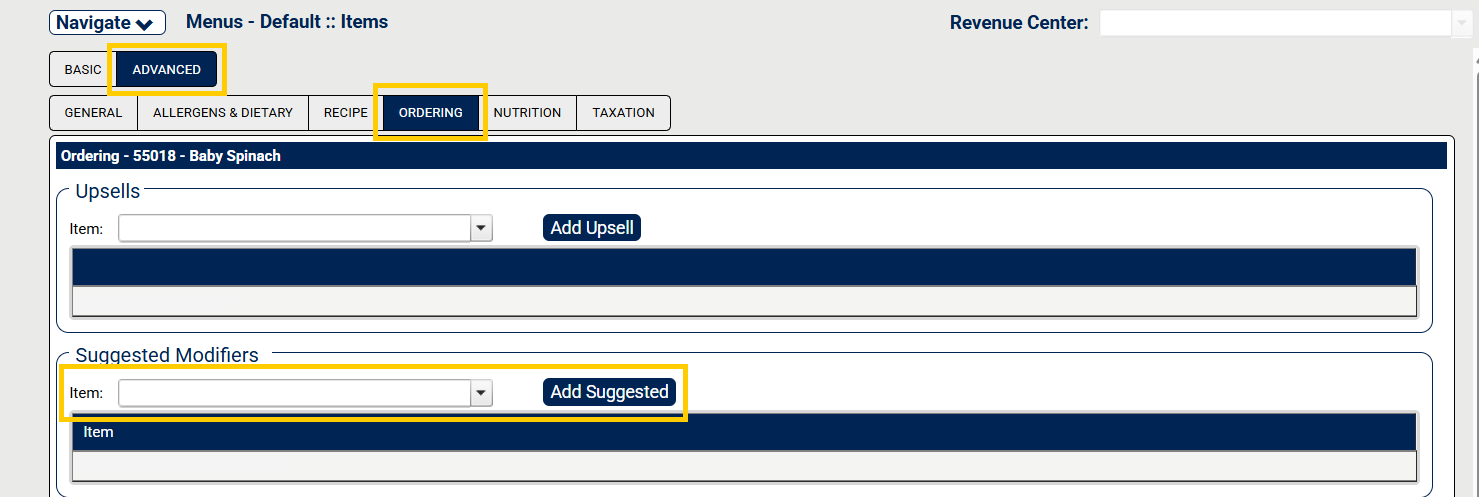
From Items, select the appropriate menu item, select Advanced and select Ordering.
From Ordering, scroll down to Suggested Modifiers.
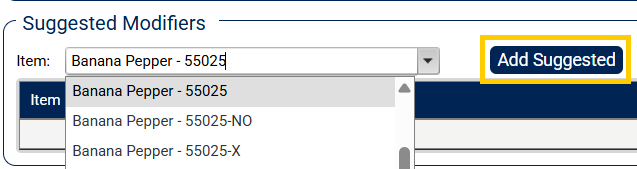
From the Suggested Modifiers, select the Item dropdown, select the item to add as a suggested modifier, and select Add Suggested. All existing menu items are listed in the Item dropdown.
From Suggested Modifiers, repeat step 3 as needed.
From the bottom-right of Ordering, select OK.
Screen Capture
Advanced - Ordering - Add Suggested |
| |
Item dropdown - Add Suggested |
|
Build Your Own Menu Items
There are aspects of building menus that contain Build Your Own Menu items. For example, a menu may include Build Your Own Pizza which includes various pizza toppings and steps, different types of dough, sauces, cheeses, and meats.
Nota
Items are grouped based on customer preference.
Kiosk Templates
Importante
To use Menu Genie, templates must be set up by the Foodservice Management (FSM) Creative Team. Templates define which button types are available within the Menu Genie.
There are three categories of templates in the FSM system:
Select 1 of Templates
Select 1 of templates are used for items and menu buttons that required the guest to select one item or menu button. Example of Select 1 of templates include:
Template | Description | ||||||||||
|---|---|---|---|---|---|---|---|---|---|---|---|
Select 1 of N | The N indicates that the template has no maximum button quantity and the buttons will be auto-arranged on the menu. While there is no set maximum quantity, most user interfaces display up to 15 buttons on the screen at a time for wide screen kiosks. The number of menu buttons is reduced to 12 on screens with a 4:3 aspect ratio. If there are more active buttons than can fit on a screen, the last button is replaced with a More button. The More button navigates to the next page of items or menu buttons. The following are some examples of variations of this template:
| ||||||||||
Select 1 of Upsell | This template should be used for menus where a guest can choose one of a group of items or choose No, Thanks to continue. These items are typically add-ons to the previous item ordered, such as side items or beverages. Using this template allows the Foodservice Management system to track selected items as upsells. | ||||||||||
Select 1 of Mod | This template is used for menus where a guest can select only one of a group of modifications to the previously selected item, such as a bread type when building a sandwich. | ||||||||||
Select 1 of Mod Upsell | This template is used when a guest can choose one of a group of upsell modifications or choose No, Thanks to continue. Typically, these modifiers have a price such as add bacon $1.00 or add guacamole $1.50. | ||||||||||
Select 1 of DA | This template operates the same way as Select 1 of N templates. The difference with this template is in the setup. The DA in the template name indicates a feature know as Drag-Along. This means that the menu using this template looks at the previously selected item or menu button and displays one or more of the following:
What is displayed is determined by the Creative Team's layout. This template's primary purpose is to give the guest more information and a larger image of the item selected. |
Select Many of Templates
Select Many of templates are used for modifiers where the guest can select more than one option to add to the previously selected item. Examples of Select Many of templates include:
Template | Description |
|---|---|
Select Many of N | The N indicates that this template has no maximum button quantity and the buttons are auto-arranged on the menu. While there is no set maximum quantity, most user interfaces display up to 15 buttons on the screen at a time for wide screen kiosks. The number is reduced to 12 on screens with a 4:3 aspect ratio. If there are more active buttons than can fit on a screen, the last button is replaced with a More button. The More button navigates to the next page of items or menu buttons. This template can be used for menus where the guest can add modifiers to their selected item. It can also be used in conjunction with recipes to allow guests to remove selected modifiers from the previously selected item. If a guest selects a Salad, the menu displays the preselected, included ingredients that are each connected to the item on the Recipe tab. To use this template, a No version of the modifiers must exist in the item list with the same POSID plus –NO added to the end of the POSID. For example, if Sliced Tomatoes’ POSID is 50034, then No Sliced Tomatoes needs to use POSID 50034-NO. ImportanteIf the menu calls for an included quantity or maximum quantity, use a Select Many of NE Check template. That feature is not supported on this template. |
Select Many of Flavor | This template is used for a menu of modifiers that will allow a guest to choose many modifiers as well as multiple quantities of those modifiers by using the plus and minus buttons that appear on the selected buttons. For example, if the item selected is 1/2 Dozen Cookies, the follow-up menu should allow the guest to choose 4 chocolate chip, 1 peanut butter, and 1 oatmeal raisin. |
Select Many of Items | This is a template that is one of a few Select Many templates that should be used for items. It is used for items that are not modified. As with all Select Many menus, a single Continue menu will follow. A common use for this template is beverages or desserts. |
Select Many Items - Qty | This template allows the guest to choose more than one of a single item through the use of plus/minus buttons that appear on each selected item. This template is usually a better choice than the Select Many of Items template. |
Buffet | This template is a simplified version of a Select Many Items - Qty template. This template is created specifically for these types of menus and is usually limited to one or two items per menu. |
Select Many of NE Check | This template has the same outward appearance as the Select Many of N template, and should be used when the menu requires an included quantity, a maximum quantity, or both. Three modifiers are needed for each button. The No modifier, the modifier, and the upcharge modifier. If the included quantity is less than the maximum quantity, the guest is allowed to add as many modifiers as desired until the maximum is met.
After the maximum quantity is met, the menu will auto-advance to the next menu. The guest can select Continue at any time to advance to the next menu. If the included quantity and the maximum quantity are equal, only the normal modifiers are added to the order. After the maximum quantity is met, the menu will auto-advance to the next menu. If the guest selects the Back button to return to this menu, all unselected buttons should appear to be grayed out. The guest can then deselect one of their previous selections and change their selection. When this template is used with recipes, the template allows a one to one item swap of each ingredient and add the extra modifier for each ingredient greater than the quantity in the recipe. The extra modifiers typically have a price. |
Select Many of LNM | This template gives the end user three options for each modifier. Some common variations:
|
Select Many of NE | This template has the same outward appearance as the Select Many of LNM template. This template should be used when an included quantity, maximum quantity, and recipes are a part of the equation. When used with recipes, the recipe modifiers are preselected. The guest can deselect the checked box, and the button text displays for the No version of the modifier. |
Other Templates
There are additional templates that are designed for specific purposes. These templates are set up in the menu path and usually do not have specific items or menu buttons assigned to them. They include the following:
Template | Description | ||
|---|---|---|---|
Order Review | This template is assigned to the last menu of the ordering process. It displays a summary of the items ordered. Guests can increase or decrease the quantity of the items ordered. An Add Item button replaces the Back button. When Add Item is selected, it returns to the last menu the guest visited, which is designated as a Start menu. Typically, there is one Order Review menu per location. Multiple Order Review menus are needed only when multiple concepts are on the same kiosk. No items are assigned to this template. | ||
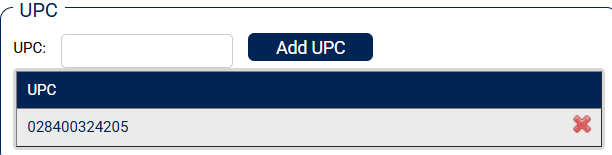
Scan Items | This template is used on kiosks with an attached barcode scanner. The items scanned need to exist in the item list with the numeric UPC code listed on the item's Advanced - General tab in Foodservice Management.
For this template, Lookup Only should be selected for these items on the Advanced - General tab for each item.
| ||
Weigh Items | This template is used on kiosks with an attached scale. The menu using this template follows a menu using a Select One of N template.
|


Set Up Menu Genie
Importante
To use Menu Genie, templates must be set up by the Foodservice Management (FSM) Creative Team. Templates define which button types are available within the Menu Genie.
→ →
To set up Menu Genie:
Select one of three categories of template in the FSM system:
From Menus, select the name of the menu where Menu Genie will be added.
From the menu, select Edit. This is the same step as adding a menu item to the menu.
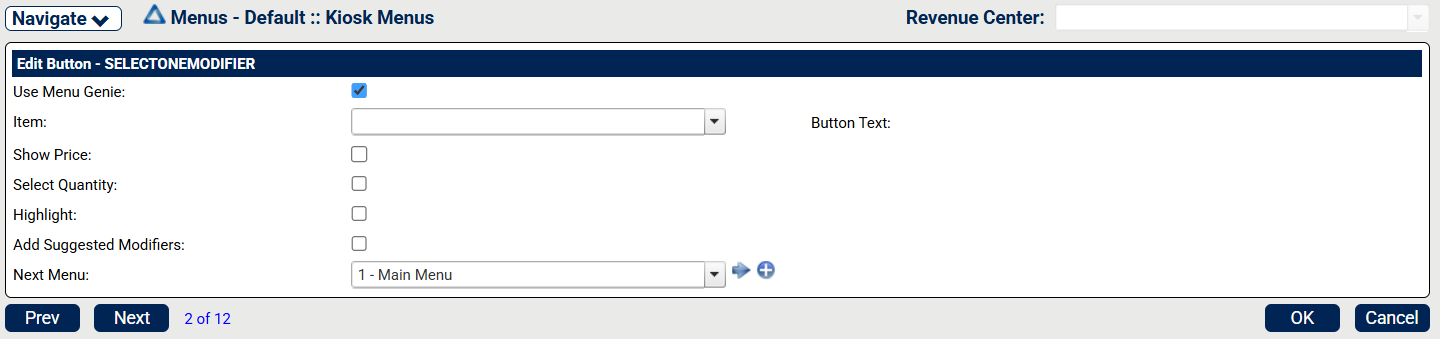
From Menu Genie Setup, select the Use Menu Genie check box. The Menu Genie option menu displays. Configure the following settings as needed:
Setting
Description
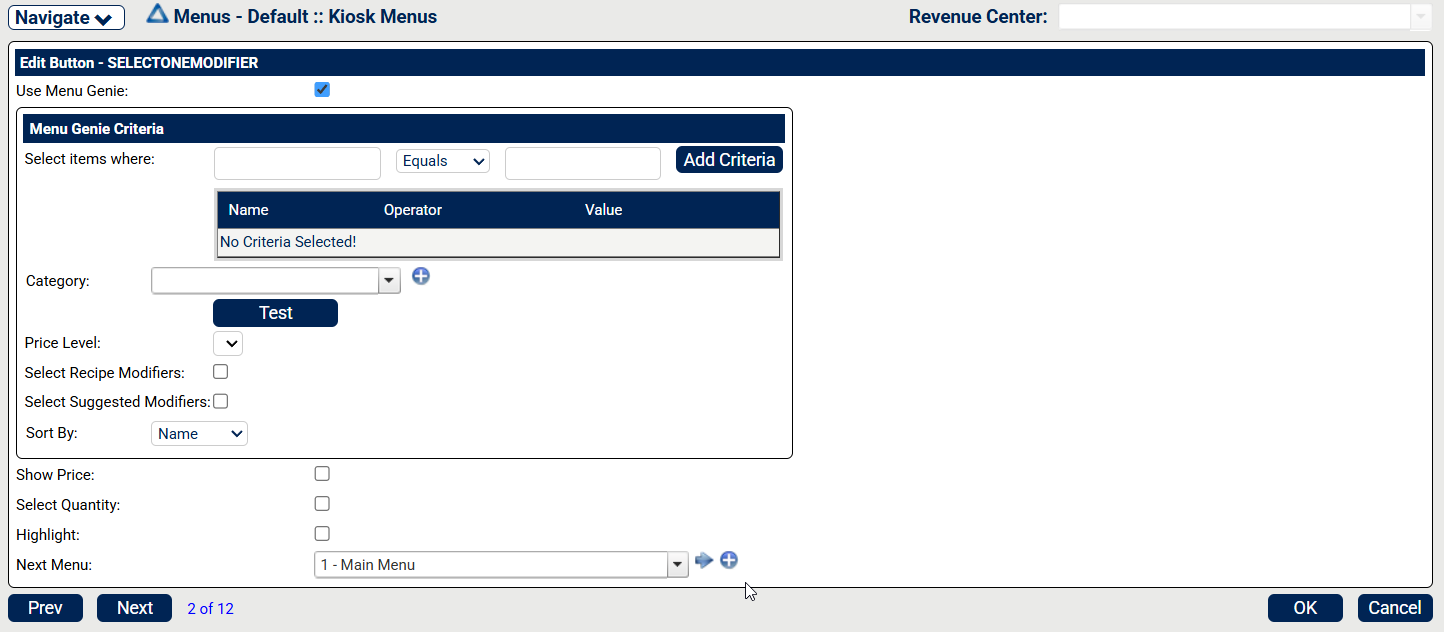
Select items where
To configure this setting:
Select the first text box and select the item from the list.
Select the rule from the dropdown. For example, Equals.
Select the second text box and select the value from the list. For example, True.
Select Add Criteria to add the criteria to the menu. A table is displayed with the Name, Operator, and Value listed.
Select Test to display all modifiers that have that attribute assigned.
If multiple criteria are configured, the modifier must meet all of the criteria specified to populate that menu.
Category
Select the category and subcategory from the dropdown.
Price Level
Select the price level from the dropdown.
Select Recipe Modifiers
Select the check box to include recipe modifiers in the menu. If no criteria is configured, the menu displays all of the modifiers from the item's recipe tab. If an attribute is configured such as Toppings, the menu displays only the modifiers that are both in the item's recipe and have an attribute of Toppings.
Select Suggested Modifiers
Select the check box to include suggested modifiers in the menu. If no criteria is configured, the menu populates with the entire list of suggested modifiers from the item's Suggested Modifiers list.
Sort By
Select the dropdown to determine how the menu items are sorted. For example, sorted by Name, which is the default setting.
Show Price
Select the check box to show the menu prices.
Select Quantity
Select the check box to allow the option select the quantity of a menu item.
Next Menu
Select the dropdown and the next menu to display.
Nota
All settings are optional, but at least one setting must be configured to use Menu Genie.
From Menu Genie Setup, select OK to complete the setup.
From Menus, set Continue Menu.
From Menu, select OK to complete the menu setup.
From Menus, select Save and Publish to save and publish the menu.
Screen Captures
Use Menu Genie |
| |
Menu Genie - Add Criteria |
|