Provide Information to Auditors
To provide information to the Revenu Québec Auditors, complete the following steps:
Step | Topic | Description |
|---|---|---|
1 | Steps to create and print a User Report. | |
2 | Steps to access fiscal logs in the POS terminals, including Data Management configuration. | |
3 | Steps to review the digital certificates on the POS terminals. |
User Report - General Information
Review the following information before creating a User Report:
The Act respecting the Québec sales tax (chapter T-0.1):
350.60.10
Every person to whom section 350.60.4 or 350.60.5 applies shall, at the request of a person authorized for that purpose by the Minister,
(1) display a report containing the prescribed information on a device that is part of the equipment described in section 350.60.3;
(2) provide the authorized person with a printed copy of the report or send it to the authorized person by a technological means; or
(3) send the prescribed information to the Minister in the prescribed manner and at the prescribed time.
In the cases described in subparagraphs 1 and 2 of the first paragraph, the person shall also send the prescribed information to the Minister in the prescribed manner and at the prescribed time.
2023, c. 10, s. 7.
350.60.15
A person to whom section 350.60.4 or 350.60.5 applies commits an offence and is liable to a fine of not less than $1,000 nor more than $10,000 if the person refuses to display the report mentioned in section 350.60.10, to provide a copy of the report or send it in the manner provided for in that section, or to send to the Minister the information referred to in section 350.60.10 in accordance with that section.
2023, c. 10, s. 7.
POS , when integrated with the WEB-SRM service, can provide the User Report according to the law. See the brief requirements here: Revenu Québec website.
Create and Print a User Report
Nota
The following steps require View User Report permissions for the user to access the User Report.
POS Terminal → Function → Reports
To create and print a User Report:
From the Function screen, find the Reports column and select Rapport d'utilisateur MEV-WEB.
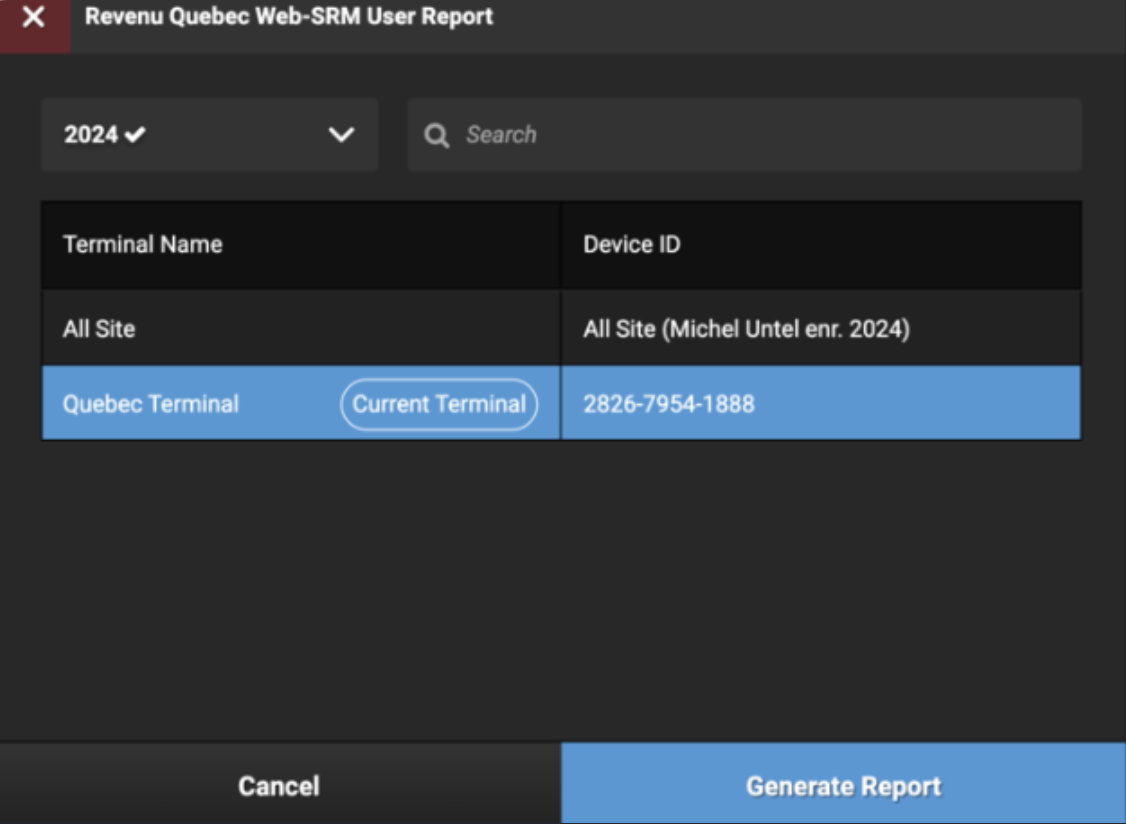
From Revenu Québec WEB-SRM User Report, select the following:
The date period. The report for the current and previous years, provided that there is data for the current year, is available. The report is always generated from January 1 to the current date or December 31.
The current POS terminal or the whole site.
Nota
The data for the report is stored and calculated in the POS device. To have a relevant and up-to-date User Report for the whole site, all active POS terminals must be online, synced, and connected to the local network.
Scenario
Result
A POS terminal does not have a network connection, a connection to the internet, or both.
The report is available for the current device in offline mode only.
A POS terminal has a network connection and connection to the internet
The report is available for the whole site and the current terminal.
There is no data for the previous year, for the whole site, or for the current terminal.
The appropriate option is not available.
From Revenu Québec WEB-SRM User Report, select Generate Report.
The report is calculated and shown in the POS screen.
The report is sent to the WEB-SRM service as a document request.
Nota
If any error occurs when sending the report to the WEB-SRM service, it will be shown in the POS screen. Review and resolve any errors when they occur.
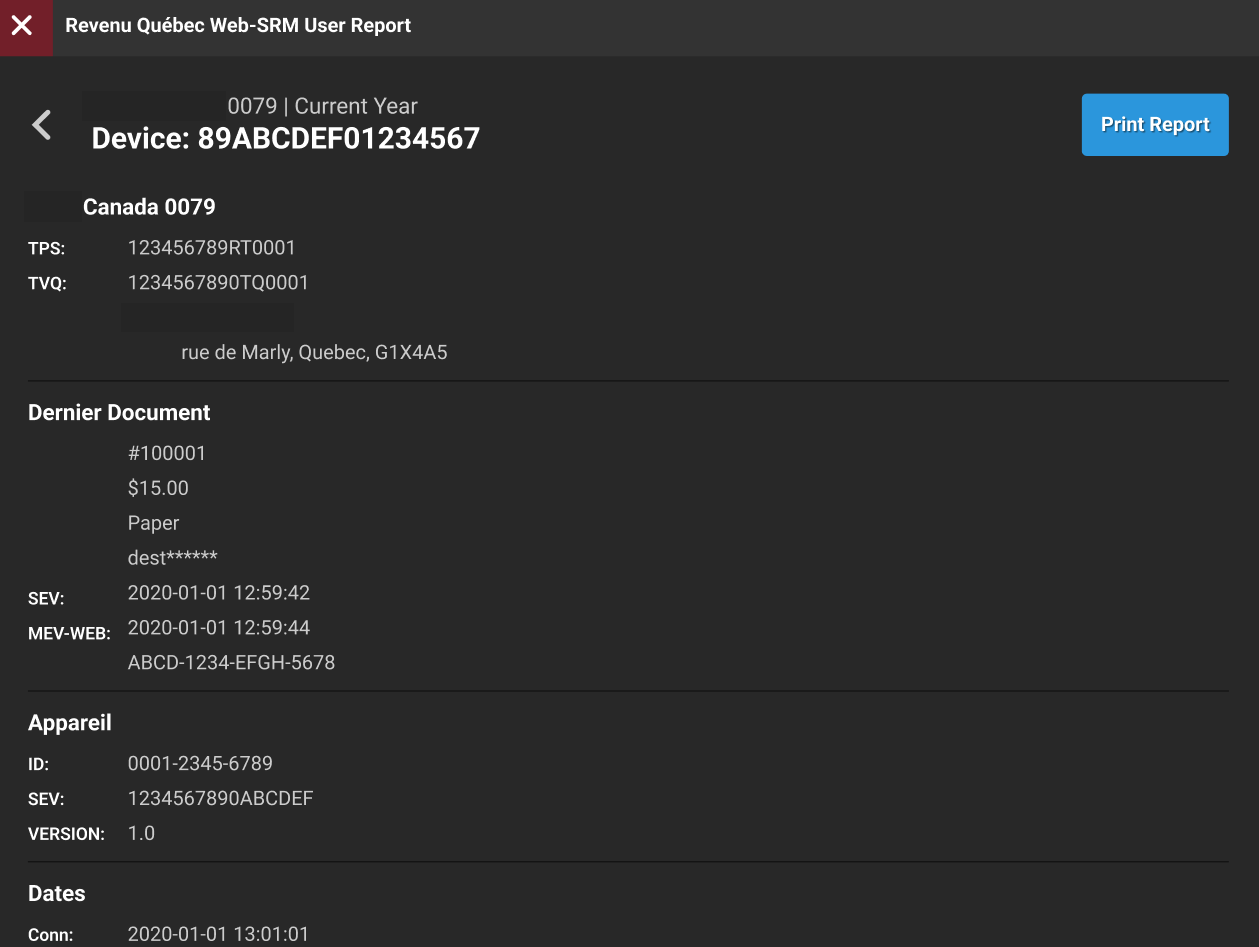
From the POS terminal screen, print the User Report.
Screen Capture
Revenu Québec WEB-SRM User Report - Generate Report |
| |
Revenu Québec WEB-SRM User Report - Print Report |
|
Access Fiscal Logs on the POS Terminal
POS provides access to the fiscal logs that are stored in AWS. A POS user can review, filter, and upload fiscal logs per day. Fiscal logs are created, sent to the Cloud database, and saved in the AWS bucket. This process can take up to 15 minutes before a log created in the POS terminal appears in the User Report.
Review Fiscal Logs on the POS Terminal
POS Terminal → System Navigation →Functions → Applications
After the external application configuration steps have been completed and application is enabled, the application displays on the Function screen under the Applications column on the POS. With this application, the user can:
Retrieve logs per day
Filter and search logs
Upload the result of log files, including filtered results, to a CSV file and save it in the device memory
To review the fiscal logs on the POS:
From the Applications column, select the fiscal log application by the name configured in the Fiscal Logs - Configuration in Data Management steps. The application opens in the embedded browser.
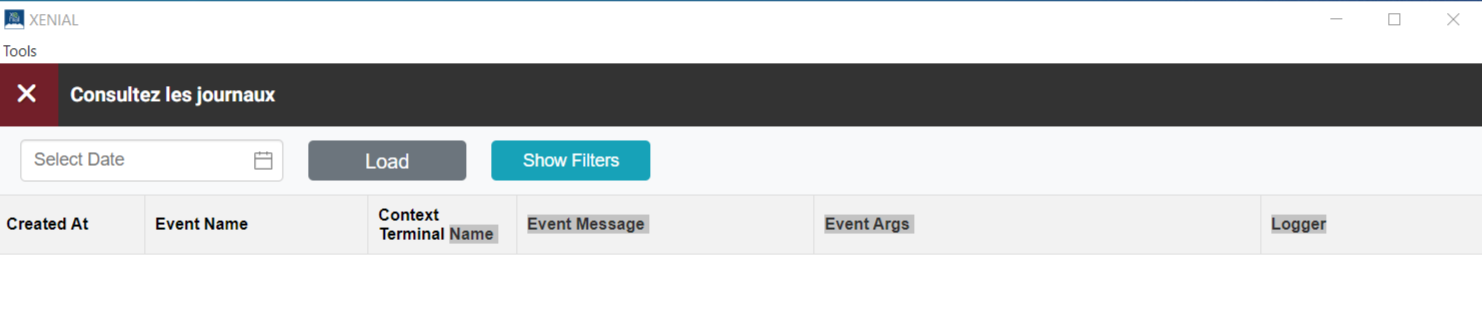
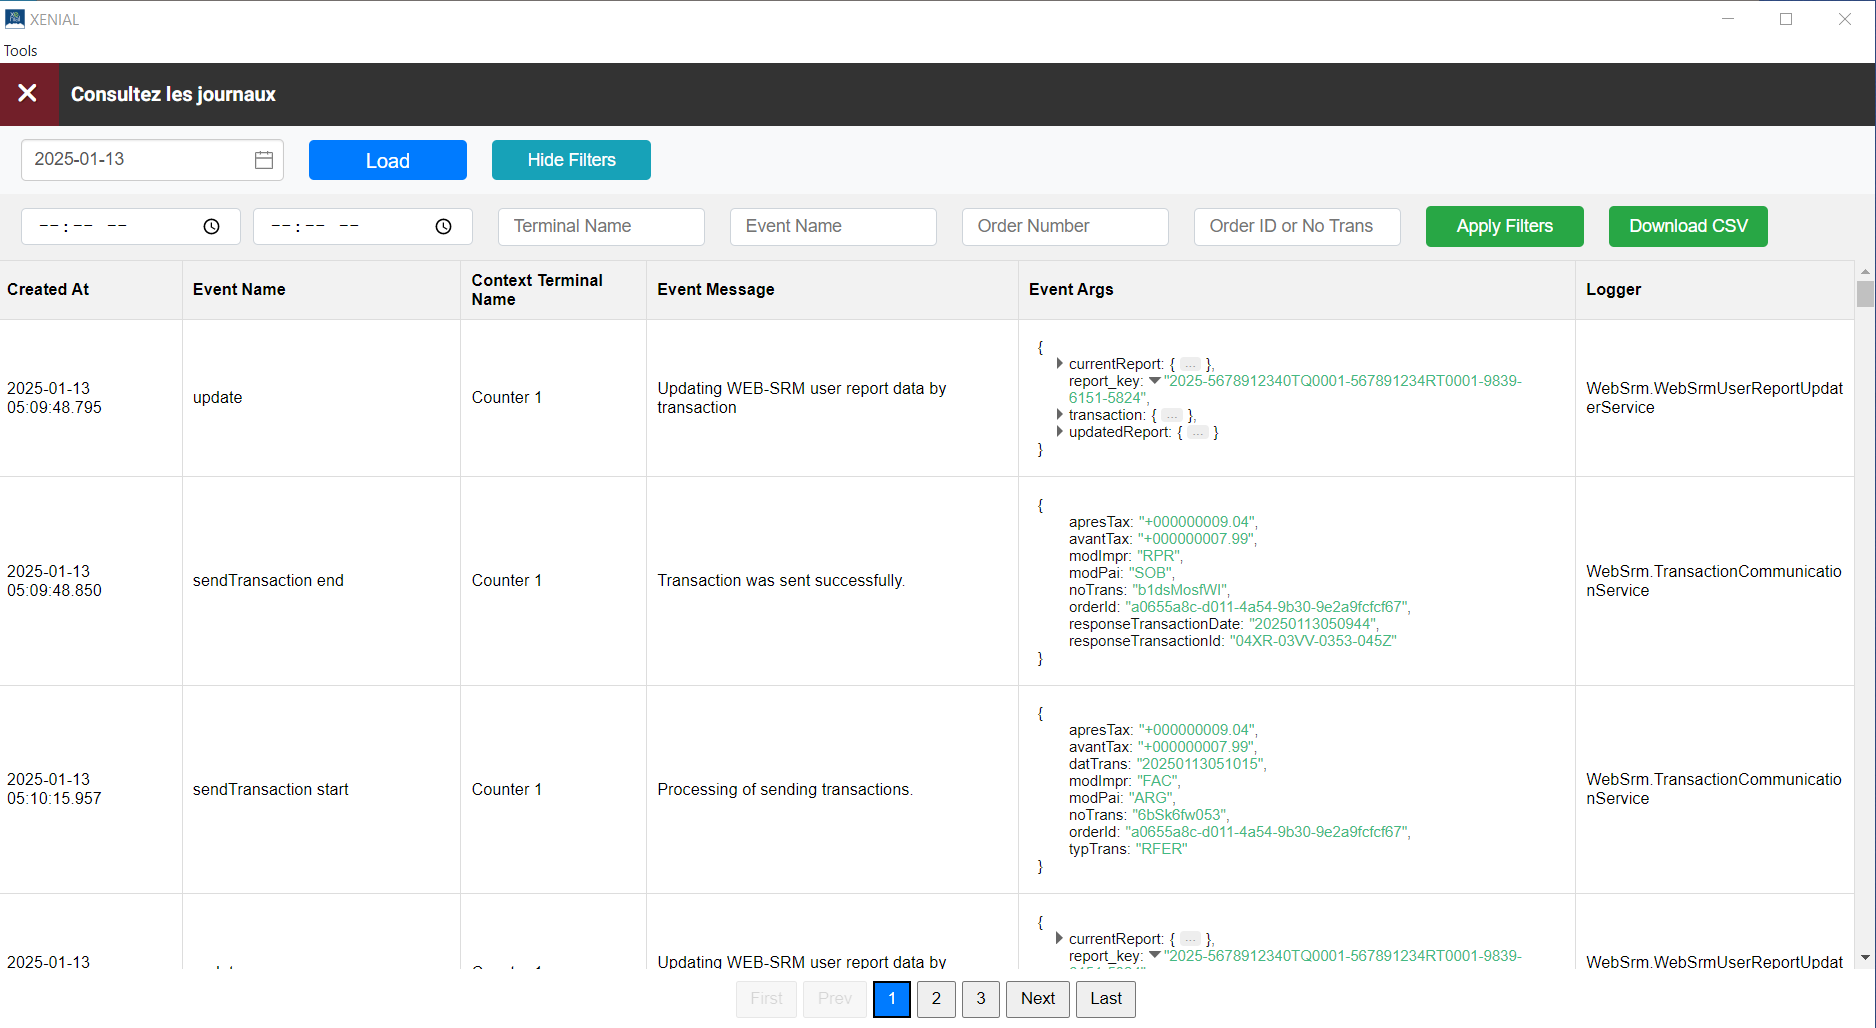
From the fiscal log application page, select a date in the field and select Load. The fiscal logs for the date and the site are uploaded and displayed in a table. If there are many records, they are shown in portions per page.
Nota
Logs in the table are shown in the local time zone of the POS terminal. However, the logs are kept with Universal Coordinated Time (UTC) when created.
From the fiscal log application page, use pagination at the bottom to switch between pages.
From the fiscal log application page, select Show Filters to access the filter pane and Download CSV option.
From the fiscal log application page, enter the needed value to the filter field and select Apply Filters. The logs can be filtered by:
Creation time period
Terminal Name
Log Event Name
Order Number
Order ID
NoTrans attribute of the fiscal transaction sent to the WEB-SRM service
Nota
The Terminal Name and Log Event Name can be used to search by a part of a string. For example, by entering mode in the Event Name field, logs related to the events POS switched to WEB SRM offline mode and POS switched to WEB SRM online mode can be filtered.
From the fiscal log application, select Download CSV to download filtered out logs or the full list of logs uploaded per day. The downloaded logs contain all attributes, including local time and UTC time of creation.
Screen Captures
Fiscal log table |
| |
Fiscal log filters |
|
Archive Fiscal Data
Business owners are required to keep a copy of every invoice, credit note, and related transaction record for a period of six (6) years after the last year to which they relate. This includes all data generated by the business' POS system.
Fiscal Data Backup Feature
To ensure full compliance with mandatory billing regulations in Québec, the Genius system provides an automated and secure data backup solution for the restaurant. This feature ensures that order and fiscal transaction information is stored and accessible for auditing purposes.
Every day, the Genius system automatically creates a backup of restaurant's activity from the previous day. This includes orders, payments, discounts, tips, and the fiscal transactions sent to Revenu Québec.
The data is backed up once per day to a secure, remote, cloud location.
Each daily backup file contains a history of orders and transactions, including detailed information about:
Orders - General information on every order, including the total amounts, created or updated during a day.
Payments and Details - A breakdown of products, payments, taxes, tips, discounts, and fees applied to each order.
Fiscal Transactions - A copy of every transaction created to be sent to Revenu Québec's WEB-SRM system.
This data is stored securely in a digital folder for the company. This folder is organized by each site and by date, making it easy to find specific records.
Fiscal Data for Audits
During an inspection, Revenu Québec inspectors may request to review these records to verify compliance with tax laws. By regularly using the backup function, businesses will have a readily available copy of their data that is complete, accurate, and ready for inspection at any time within the six-year retention period.
Access Fiscal Data
Access to this data is restricted to authorized personnel. To obtain a copy of a site's backup files for company records or for an audit, please contact your Genius representative. They are able to retrieve the requested files from your secure company folder.
Review Certificate Status and Device Identifier
POS Terminal → System Navigation → Functions
To review digital certificates on the POS terminal:
Navigate to Navigation dans le système (System Navigation) → Fonctions (Functions).
From Fonctions, select État du terminal (Terminal Status).
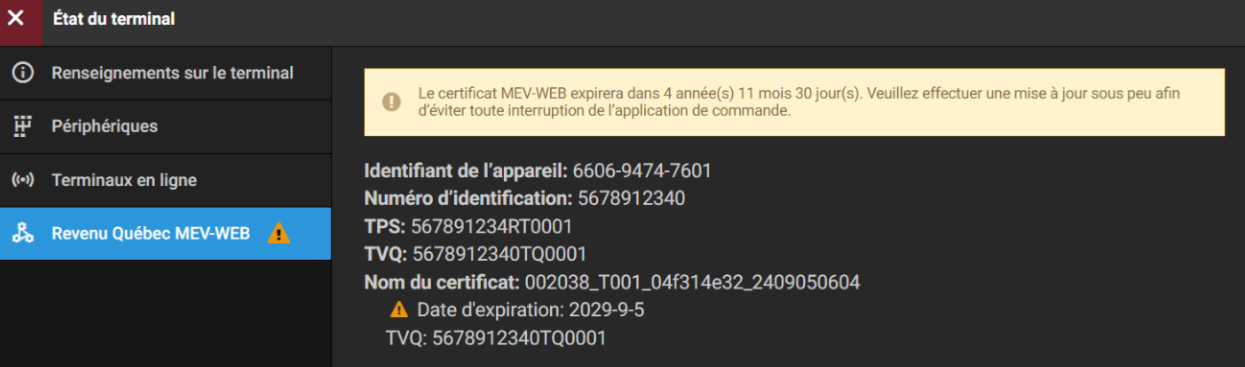
From the État du terminal screen, select Revenu Québec MEV-WEB. From this tab, details about the digital certificate can be viewed, including certificates due to expire soon. The Identifiant de I'appareil (Device Identifier) can also be viewed from this tab.
Screen Capture
État du terminal (Terminal Status) |
|