Create a Landing Page
The shared landing page feature allows online ordering customers to access a single page and choose from a designated group of revenue centers and locations. Customers can return to the landing page and choose a different location.
To create a landing page in FSM:
Create Group and Assign Revenue Centers
To create a group and assign a revenue center:
From the Portal, navigate to Customer Maintenance.
From Customer Maintenance, find and select the customer, and select Revenue Centers.
From the Revenue Centers List, select the revenue center.
From the top of the revenue center page, select the Groups tab.
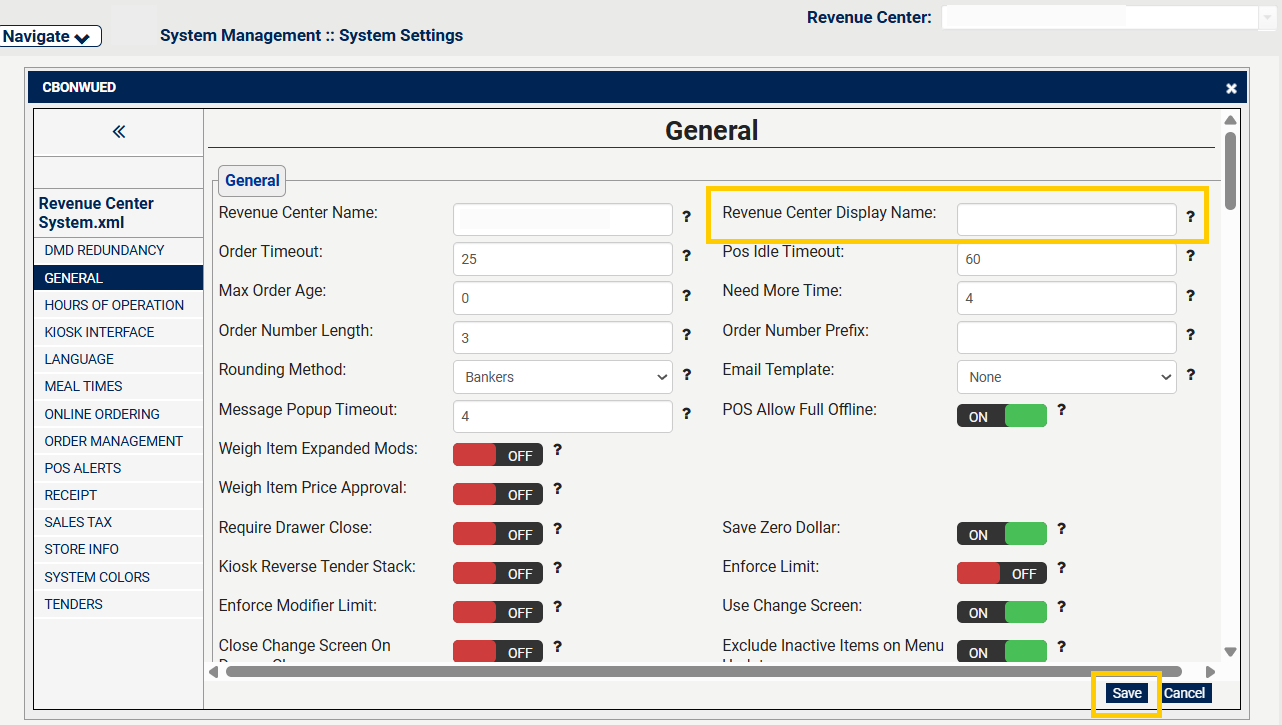
From Groups, select Add Group.
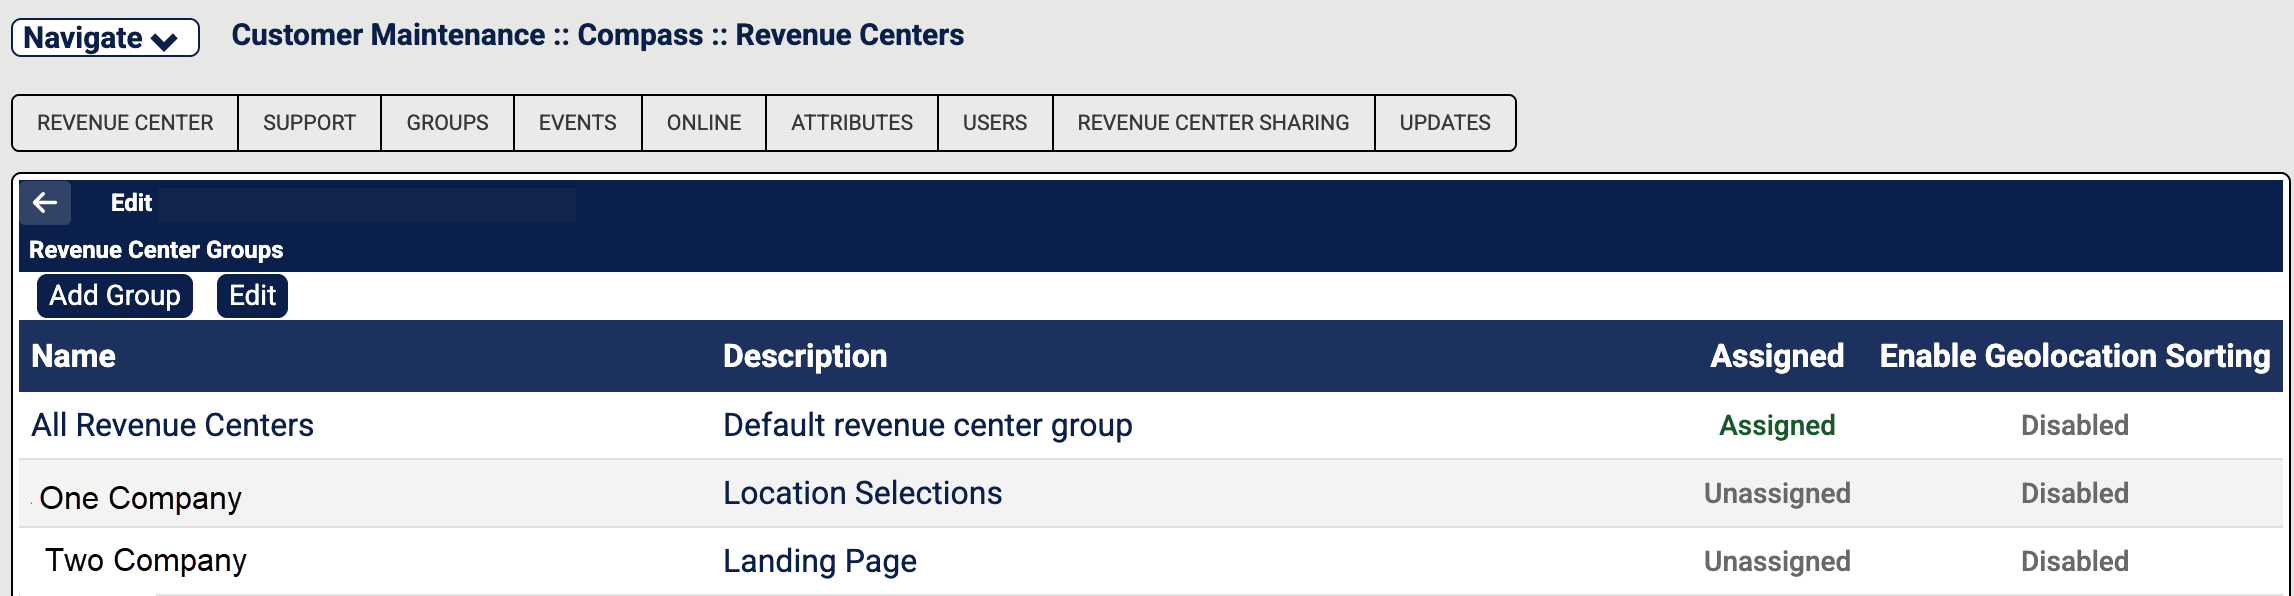
From Edit Groups, define the following settings:
Field Name
Description
Group Name
Enter the group name in the text field.
Importante
The group name cannot contain spaces.
Description
Enter a description of the group in the text field, if desired.
Assigned
Toggle on to assign to assign the revenue center to this group.
Enable Geolocation Sorting
Toggle on if geolocation should be enabled for the group.
From the lower-right of Groups, select Save.
Nota
The revenue center used to create the group can be assigned to the group when it is created by enabling the Assigned toggle.
Add Additional Revenue Centers to the Group
To add additional revenue centers to the group:
From the upper-left of Groups, select the Back to the Revenue Centers List arrow.
From the Revenue Centers List, select the revenue center to add to the group.
From the revenue center, select the Groups tab.
From Groups, locate the group and select Edit at the top of the Groups section.
From Edit Group, toggle on Assigned.
From the lower-right of Groups, select Save.
Repeat steps 1-6 to assign additional revenue centers. Continue until all required revenue centers have been assigned to the group.
Screen Captures
Customer Maintenance | Groups page |
| |
Edit Groups |
|
Enable the Landing Page
→ → → →
To create a landing page:
From Revenue Centers, select Open for the revenue center.
From the left navigation of the revenue center page, select Online Ordering.
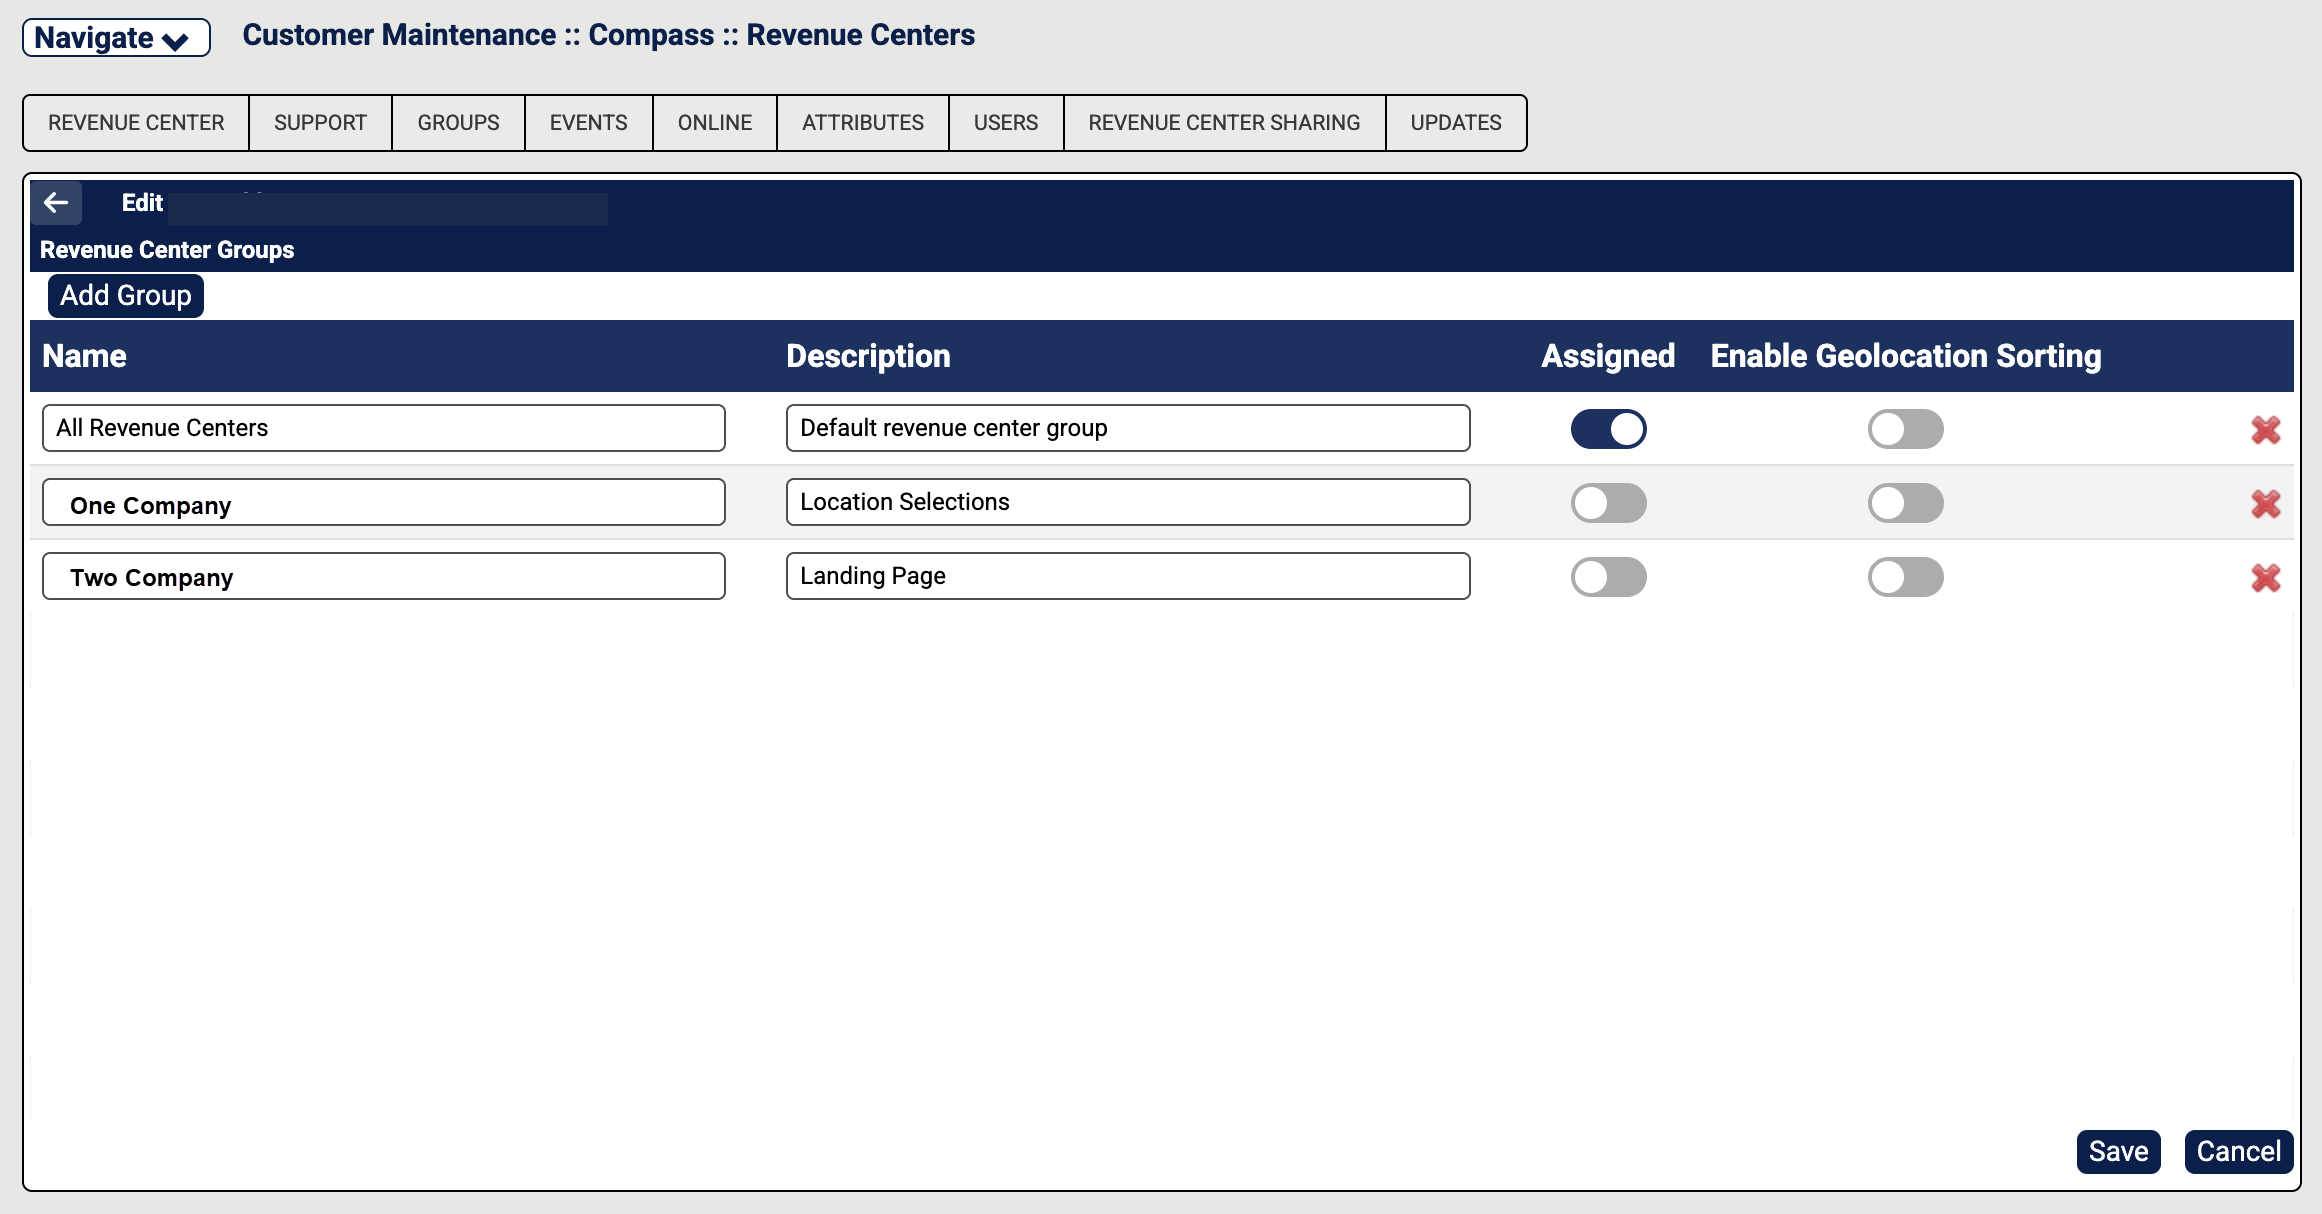
From Online Ordering, select Click to show Online Ordering Landing Page.
From Online Ordering - Landing Page, toggle ON for Enable Landing Page.
From Online Ordering - Landing Page, enter the name of the revenue center category in the Revenue Center Category text field. When multiple revenue center categories are entered in this field, it becomes a dropdown menu.
Nota
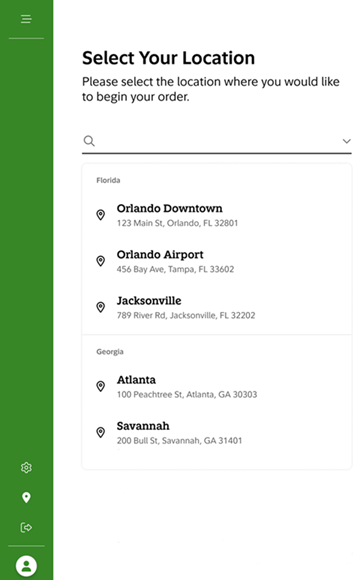
The Revenue Center Category setting allows for one or more revenue centers to be added to a categorized group, such as states or buildings. After the groups are created and revenue centers assigned to them, the user interface (UI) landing page dropdown menu displays the group names as headers with the assigned revenue center listed under each header.
From Online Ordering - Landing Page, select the appropriate landing page group from the Landing Page Group dropdown.
Nota
The Landing Page Group is the group created in Create Group and Assign Revenue Centers.
From the lower-right of Online Ordering, select Save.
From the lower-right of System Management, select Publish and select OK from the dialog box.
From System Management :: Publish, select Publish Now.
From System Management :: Publish, select Continue. A message displays at the top of the System Management page after the Publish process has completed on FSM Portal.
Screen Capture
Foodservice Management Portal | Online Ordering | Landing Page configurations |
| |
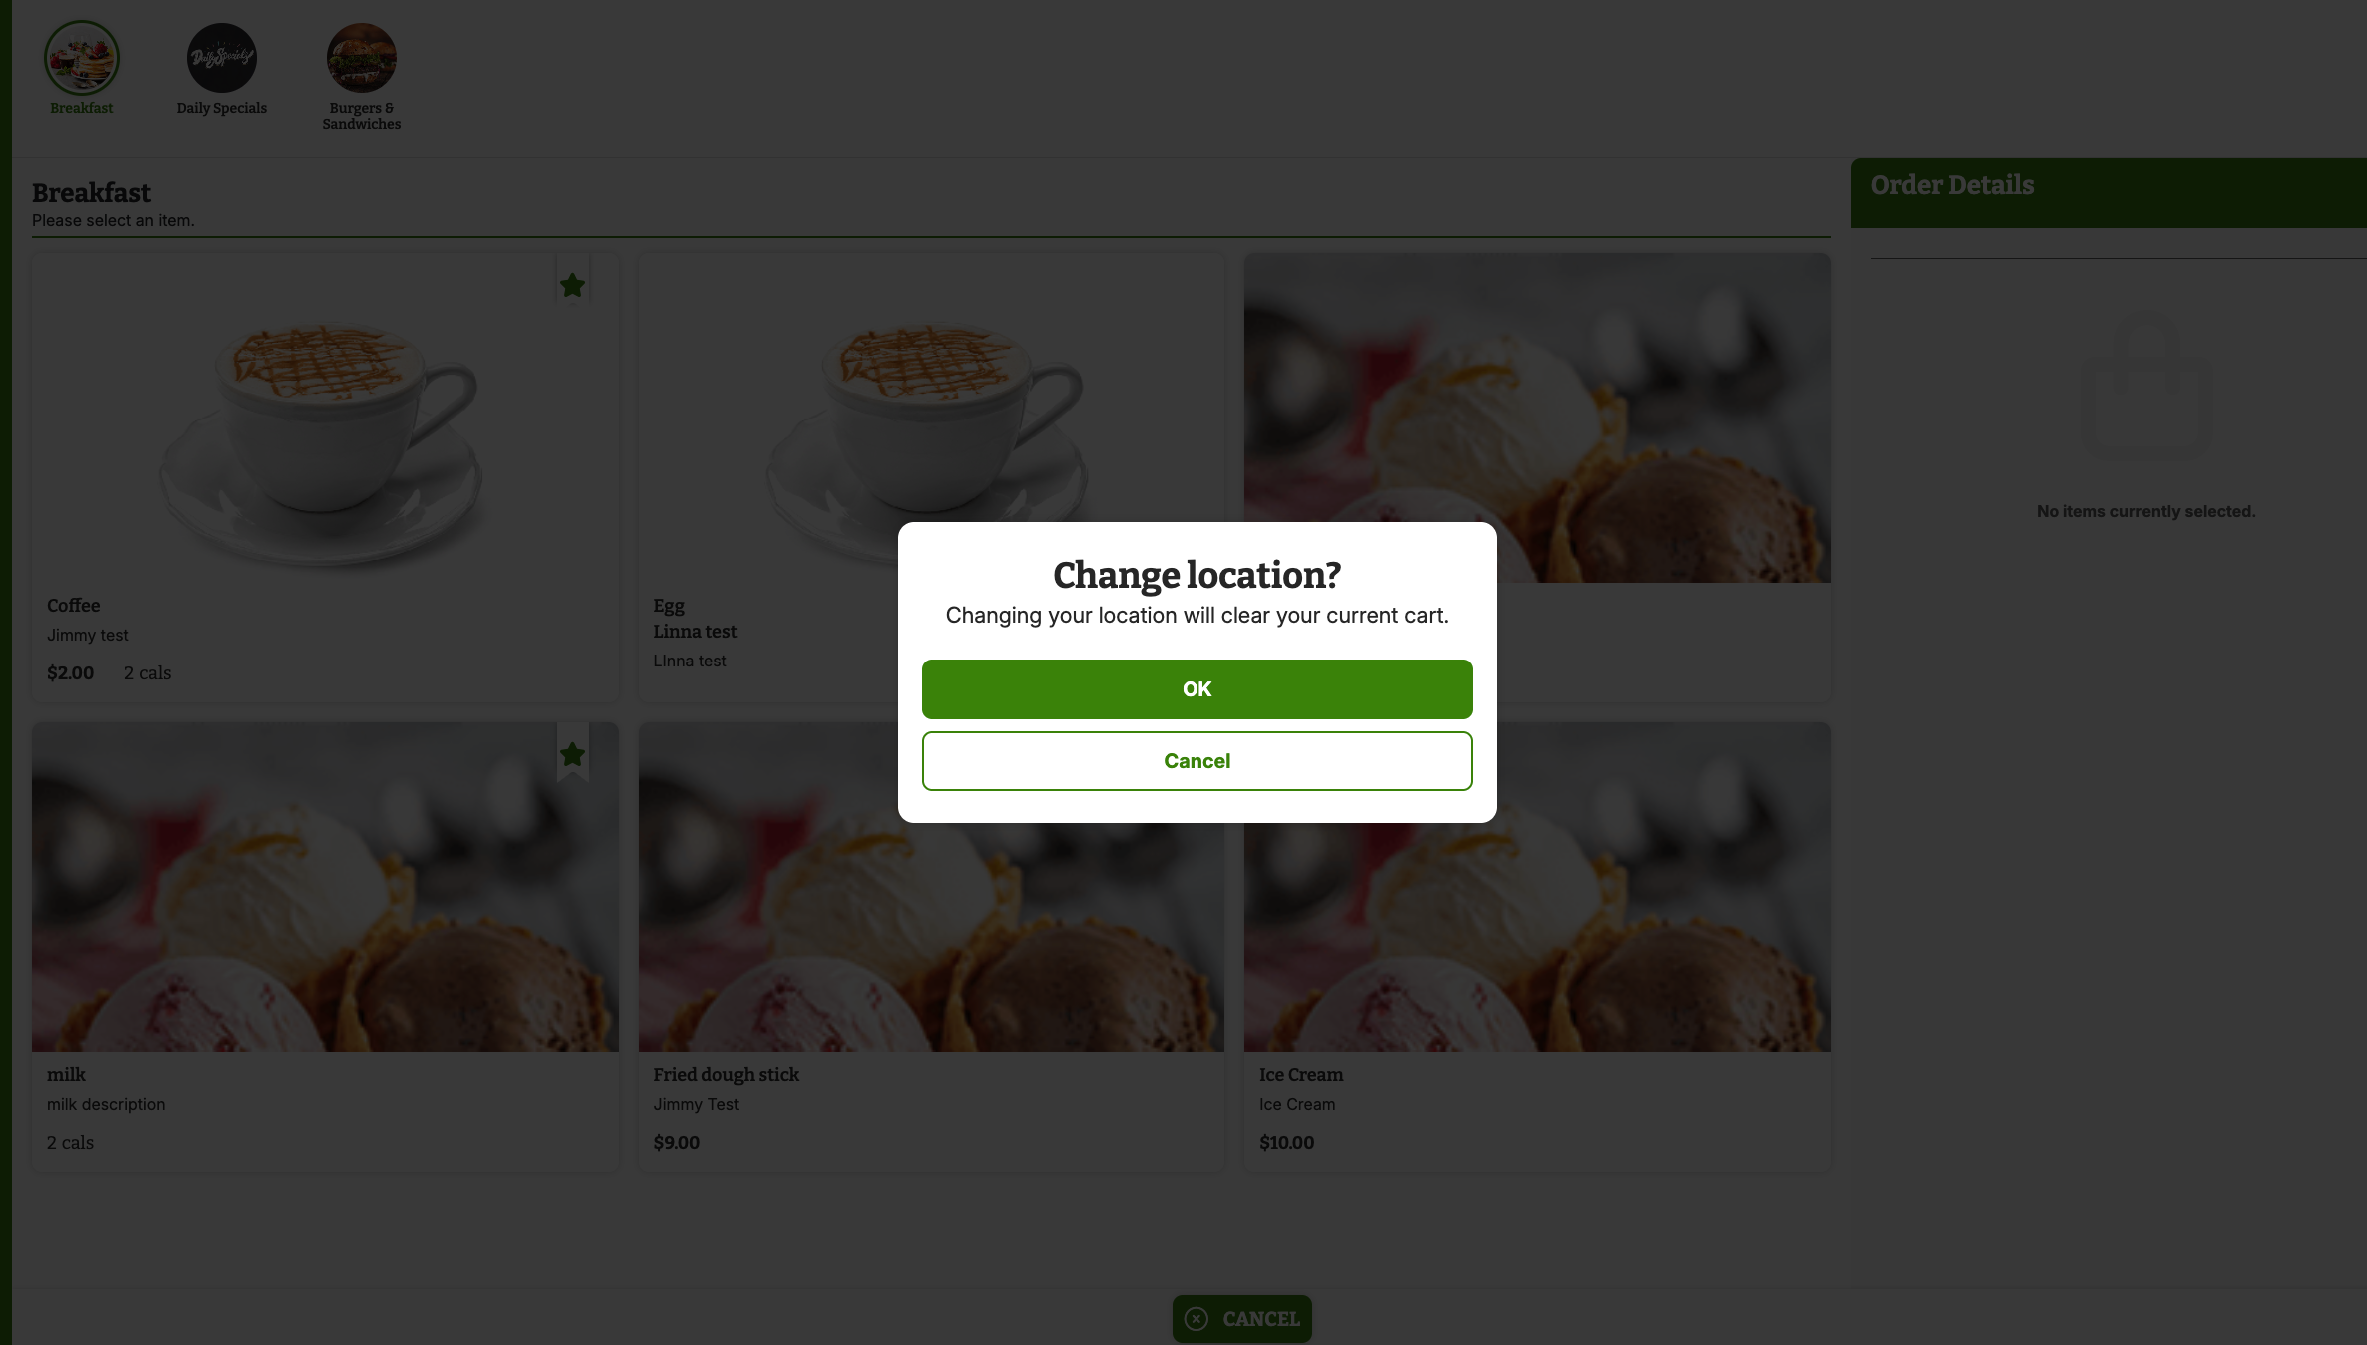
User experience | Change location prompt |
| |
User experience | Change location landing page with categories |
|
Configure Revenue Center Name
→ → → →
To configure the Revenue Center name for the customer-facing display:
From Revenue Centers, select Open for the revenue center.
From the left navigation of the revenue center page, select General.
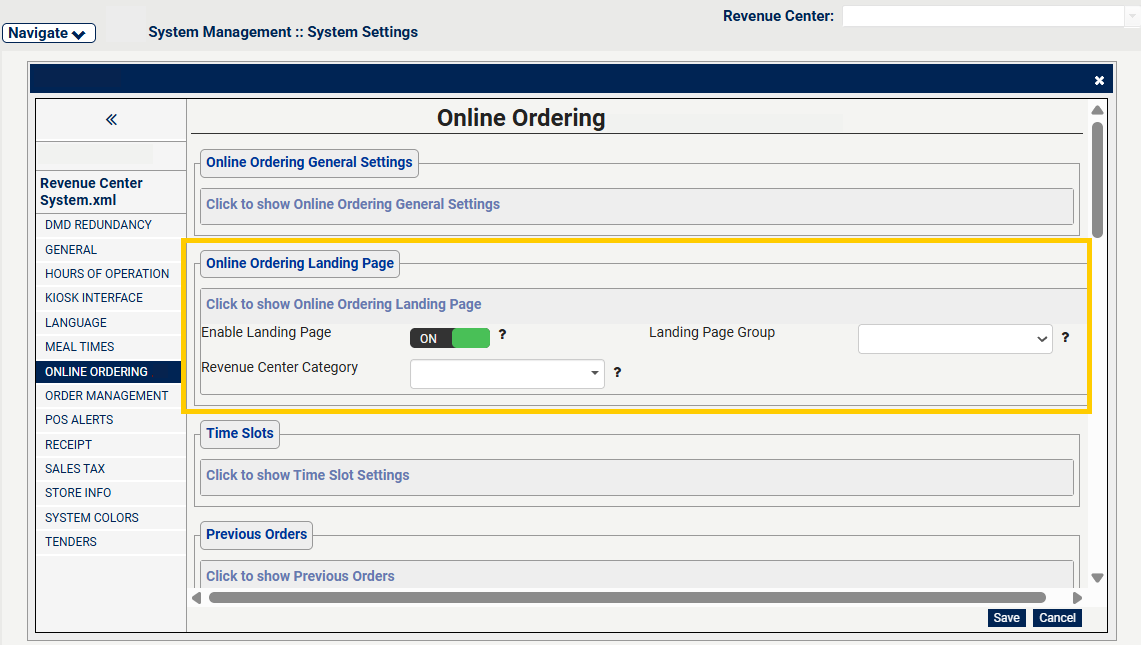
From the General page, locate the Revenue Center Display Name setting.
From the Revenue Center Display Name setting, enter the name that should be displayed to customers.
From the lower-right of the General page, select Save.
Screen Capture
Foodservice Management Portal | General | Revenue Center Display Name setting |
|